Page 1 of 1
Easy Wingtip Hinges
Posted: Thu Apr 03, 2008 2:34 pm
by bullojm1
This past weekend I tackled the project of making my wingtips removable. Here is how I did it:
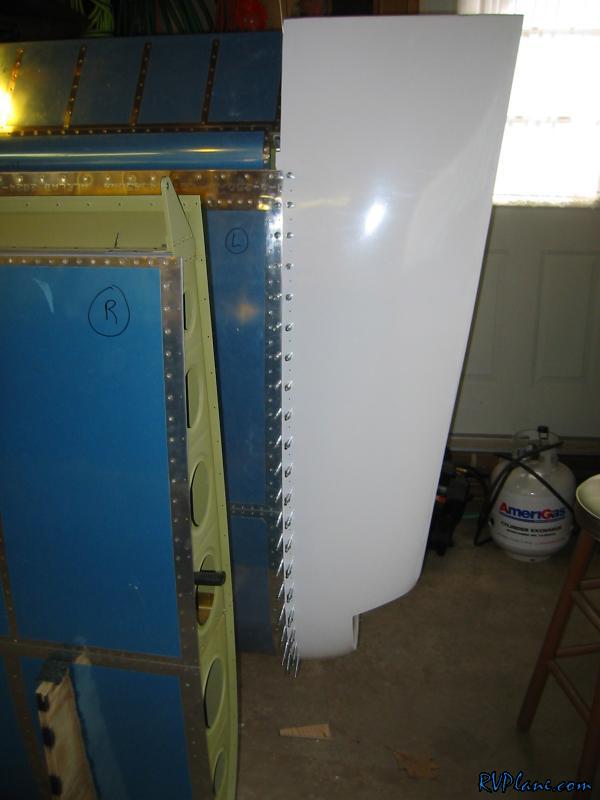
First I trimmed the wingtip and drilled it to the wing. I added in extra holes in the wing skin - one between all of the prepunched ones.
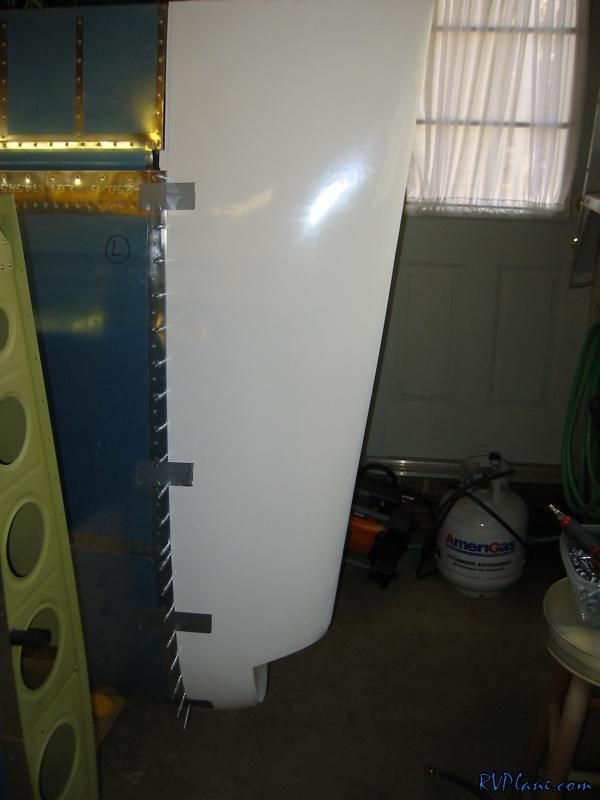
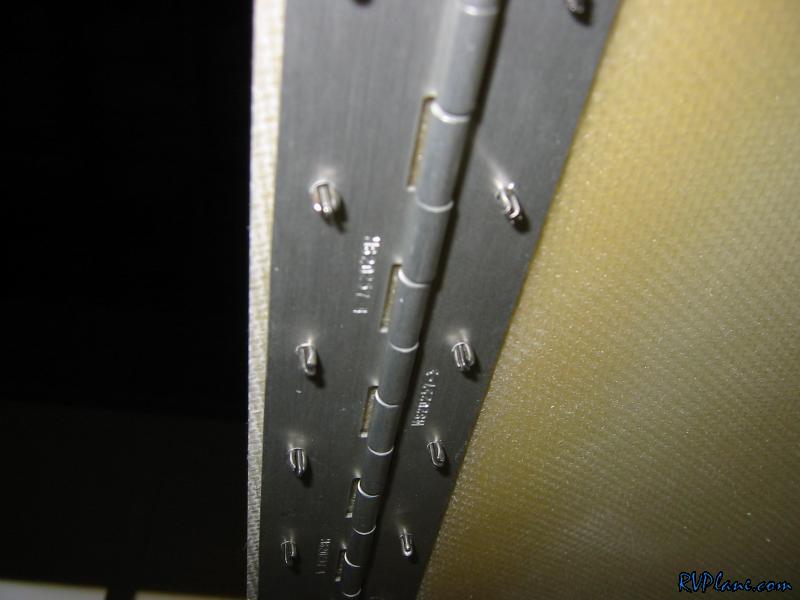
Next I took some AN257-P4 (fatter) hinge and mated it with some AN257-P3 (skinnier) hinge. The P4 hinge was used on the inboard side so if there was any gap between the wingtip and the wing, you wouldn't see the eyelets. Using the holes I drilled in the first step, I backdrilled the inboard hinge. I also marked the holes for the outboard hinge and drilled them.
I then cut off the flange of the wingtip. This will be used on the wing side to act as a spacer between the wing skin and the hinge.

I left the forward flange attached to the wingtip so it will fit snugly in the leading edge of the wing.
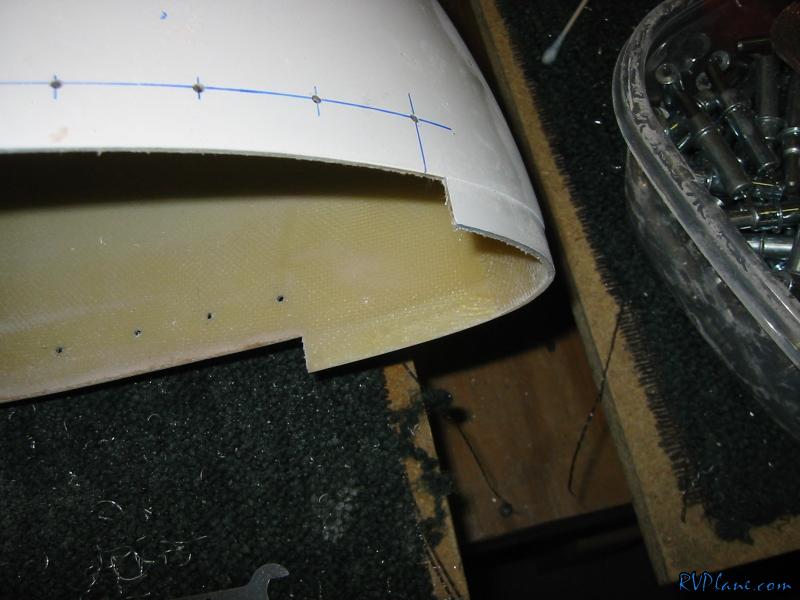
I countersunk the fiberglass flange I cut off the wingtip to accept the dimpled wing skin. I then clecoed everything together.
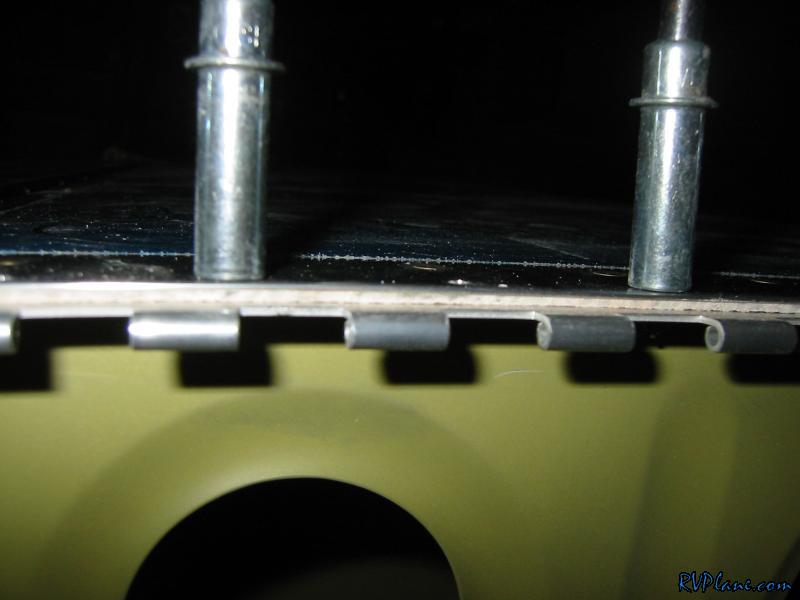
The end result was nothing but a perfect fit!
This process took about 6 hours per wing. I still need to bond the hinge to the wingtip. I am going to use a combination of flush rivets and some epoxy mixed up with flox to add in the bonding strength.
Posted: Thu Apr 03, 2008 3:28 pm
by smithhb
Mike, it looks awesome! You did a great job. I was wondering if the wing skin thickness higher than the fiberglass tip was noticeable. I was planning to do the same thing following Mike Phillip's method.
Posted: Thu Apr 03, 2008 3:47 pm
by cjensen
Nicely done Mike! Looks to be a cleaner way to do it than what I did.
Sweet!

Posted: Thu Apr 03, 2008 3:59 pm
by captain_john
Mike, nice documentation!
I am planning the same method too. Refresh this thread with pictures of the plastic work when you get a roundtuit.

CJ
Posted: Thu Apr 03, 2008 4:23 pm
by bullojm1
Bret-
I couldn't tell any noticeable difference between the height of the skin and the height of the wingtip, EXCEPT for the leading edge of one of the wingtips. I think mine was slightly misformed, so I plan on filling it with some microballoons when I get closer to the end. Other than that, it was a perfect fit.
Posted: Thu Apr 03, 2008 5:18 pm
by weezbad
very nice , i think i may try that in a couple of days.
Posted: Thu Apr 03, 2008 8:56 pm
by Lorin Dueck
Mike
- Looks great!!

- So, I guess to remove the tips you grab the hinge pin from inside the aft end of the tips and pull it back & inboard. Right?
- Any idea how you're going to secure the pin?
- Also.. how easy is it to install/remove the pin from the hinge given you have a curved camber of the wing/tips (inquiring minds want to know!)?
Thx, Lorin D
9A Wings (very SB)...
Posted: Thu Apr 03, 2008 9:07 pm
by bullojm1
Lorin Dueck wrote:
- Looks great!!
- So, I guess to remove the tips you grab the hinge pin from inside the aft end of the tips and pull it back & inboard. Right?
- Any idea how you're going to secure the pin?
- Also.. how easy is it to install/remove the pin from the hinge given you have a curved camber of the wing/tips (inquiring minds want to know!)?
Lorin-
Thanks! It turned out to be a much smaller project than I originally thought. I haven't finished them yet, but yet, they will be inserted from the aft end. I am planning in securing them to the wingtip rib with a plastic block secured to a nutplate on the rib or simply just safety wiring them to the rib. The pin is amazingly easy to insert. Even with the curve on the front top, it still slides right in. I put some boelube on it to help it out, along with grinding down the tip of the hinge pin to a point.
Posted: Thu Apr 03, 2008 10:21 pm
by Wicked Stick
I like it... Thanks for sharing your version of the hinge-pin wintips.
It appears to be the easiest method and still gives excellent results on fit.
Sounds like it eliminates the need to shim with aluminum strips, eliminates the need to remove the gel coat, and eliminates the need to stuff a light inside to see where to drill holes.
I'll be printing out this thread and saving for when I do mine.
Posted: Thu Apr 03, 2008 10:46 pm
by jim_geo
That looks awesome!!
Posted: Thu Apr 03, 2008 11:09 pm
by cjensen
Lorin Dueck wrote:
- Any idea how you're going to secure the pin?
- Also.. how easy is it to install/remove the pin from the hinge given you have a curved camber of the wing/tips (inquiring minds want to know!)?
Mike answered already, but I thought I'd throw in a pic of the plastic block on mine. The two pins slide through the block, and cross on the back side. Where they cross, I will zip tie them to the rib.


My friend Benny told me that waxing the pins really makes them easy to install and remove...also chucking the pin in to an electric drill spins them in or out effortlessly.
Posted: Fri Apr 04, 2008 7:26 am
by smithhb
Mike, what did you use to cut the fiberglass to achieve such smooth and straight lines?
Posted: Fri Apr 04, 2008 8:24 am
by bullojm1
Bret-
I used the thin cutoff wheel in a dremel. Worked great, except when using the cutoff wheel with fiberglass, the wheel would heat up VERY fast and eventually fail and break apart. Besides changing the wheels often, it went smoothly. Once it was cut, i used some 60 grit sandpaper on a block to smooth everything straight.
Posted: Fri Apr 04, 2008 8:38 am
by Spike
SCHWWEEEEET. You guys are doing some sweet work around here.
John
Posted: Fri Apr 04, 2008 1:07 pm
by dons
Very nice Mike!