Page 7 of 17
Re: a couple printed widgets
Posted: Fri Aug 19, 2022 6:16 am
by A2022
Re: a couple printed widgets
Posted: Fri Aug 19, 2022 5:59 pm
by A2022
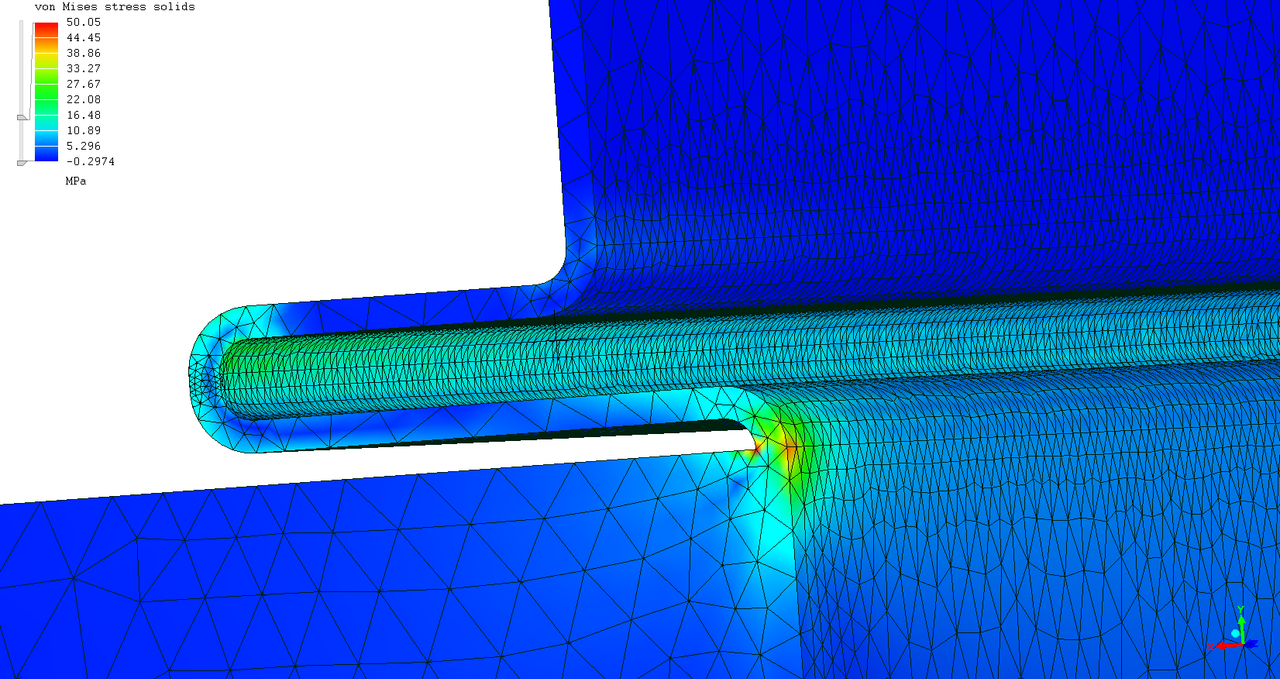
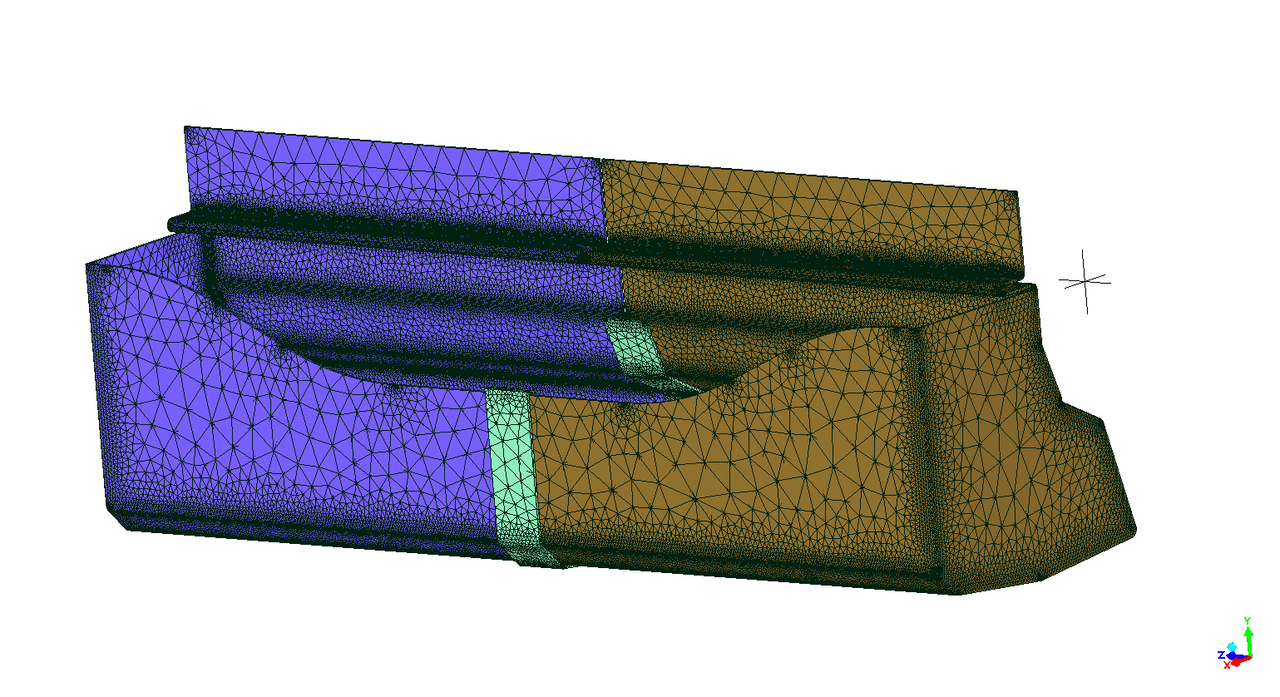
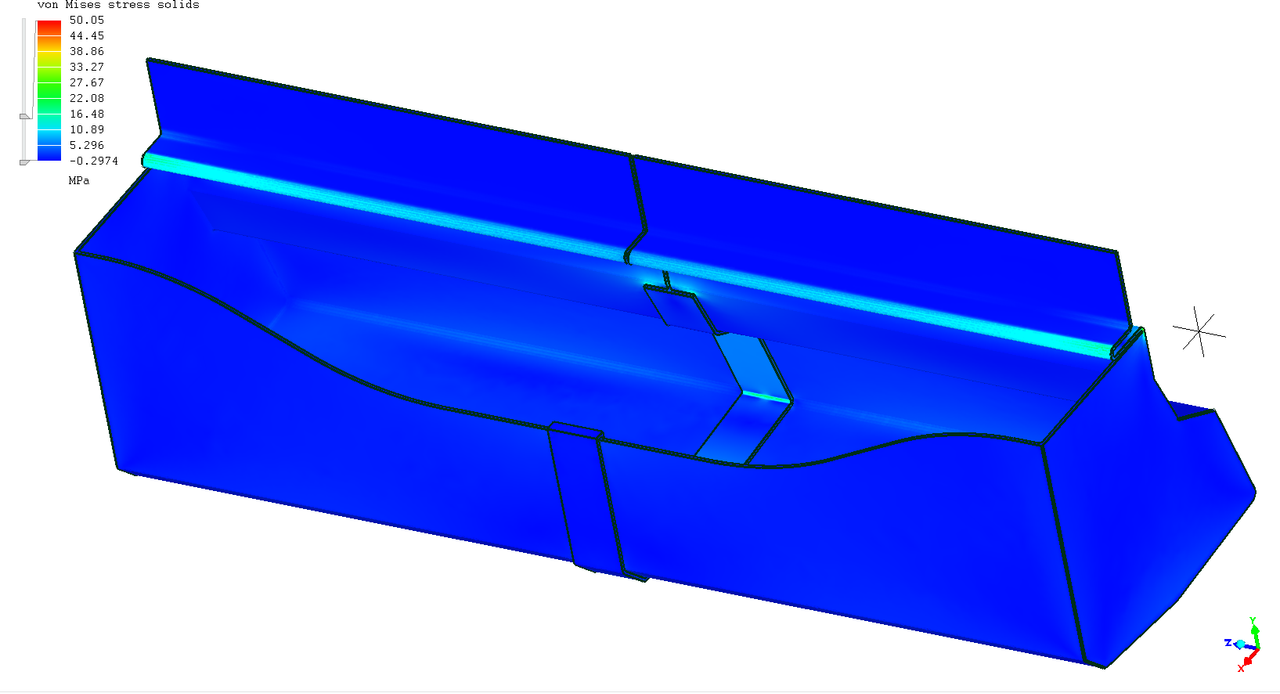
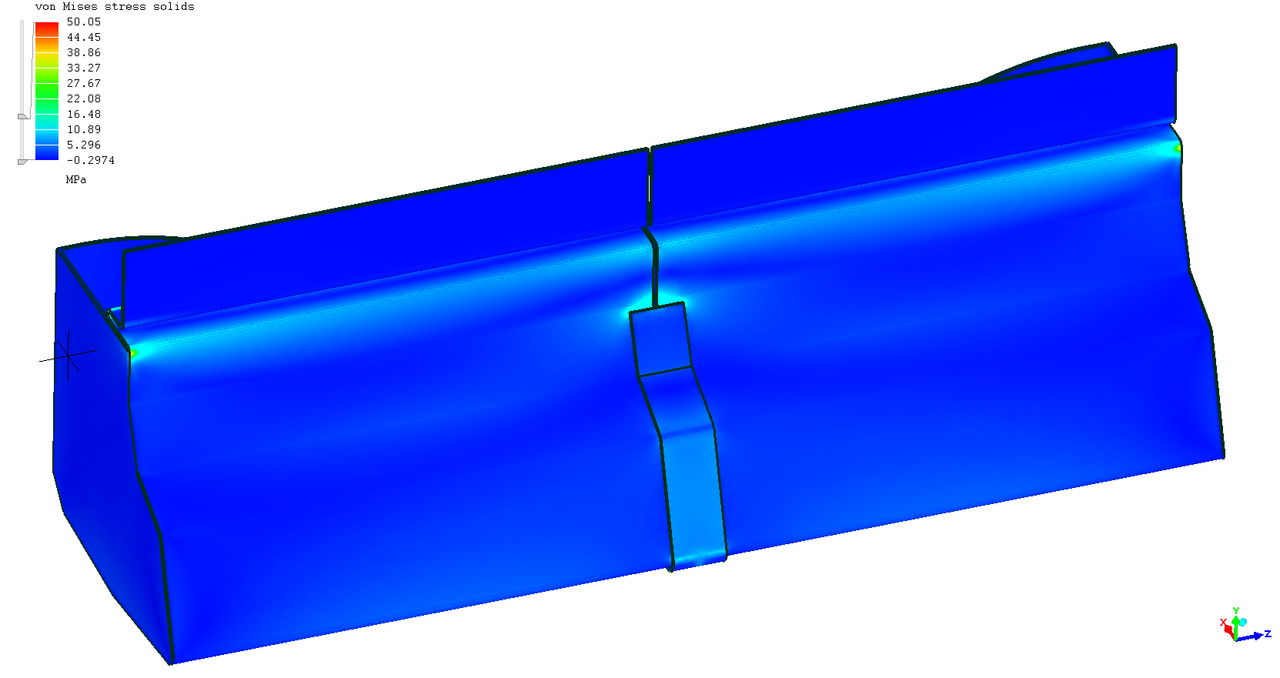
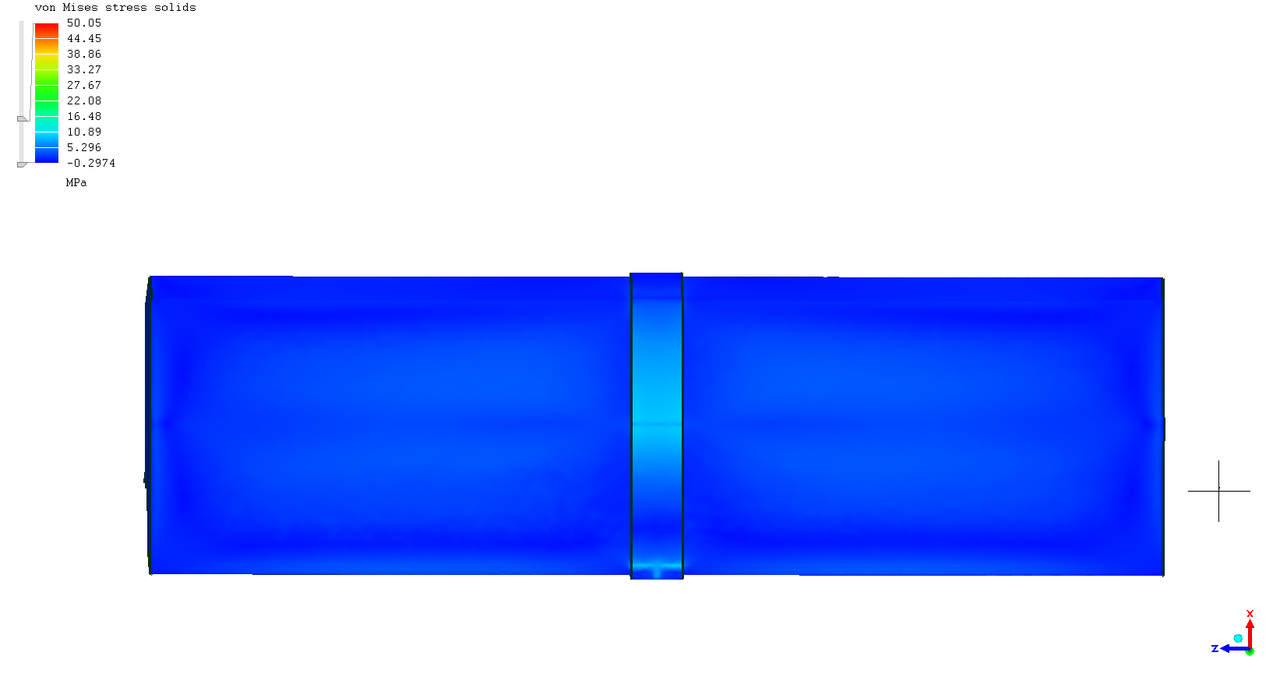
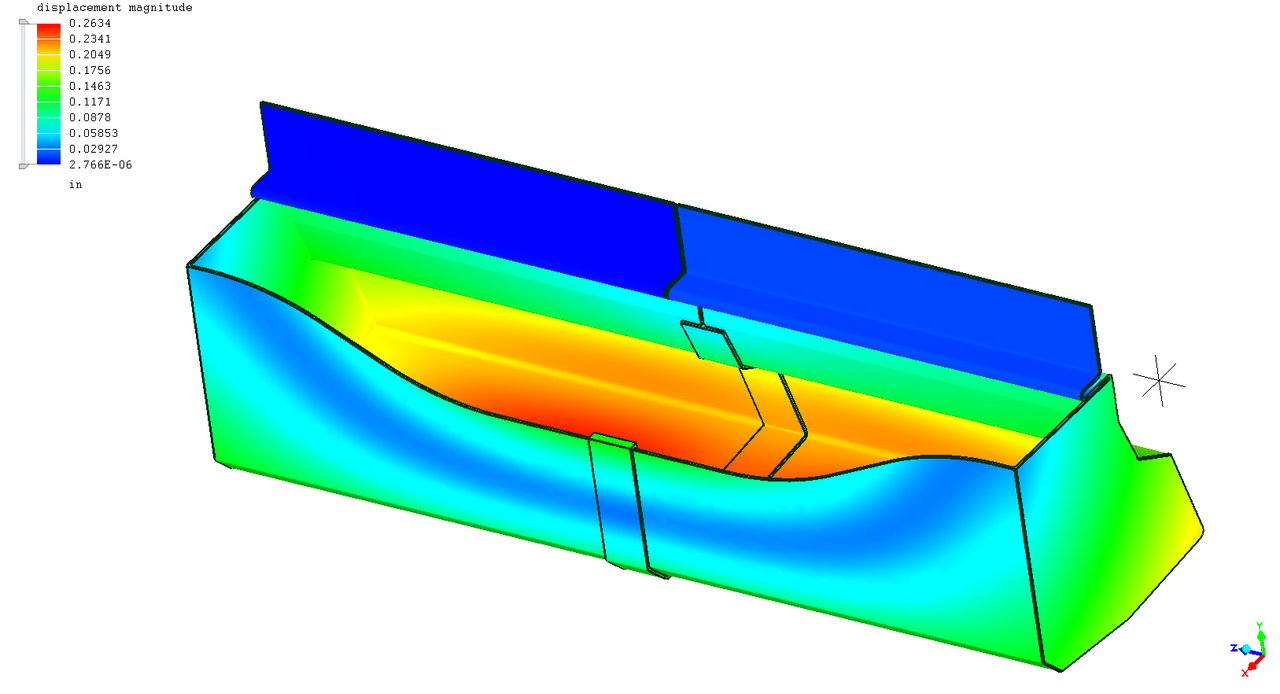
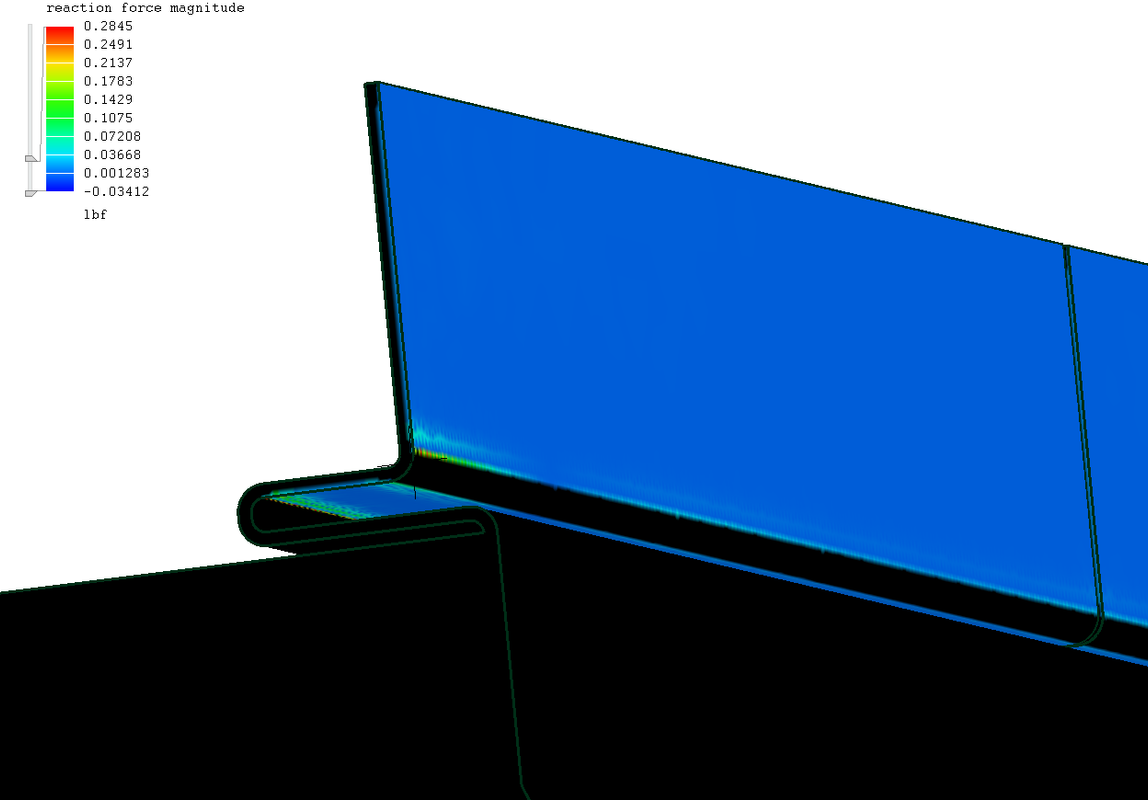
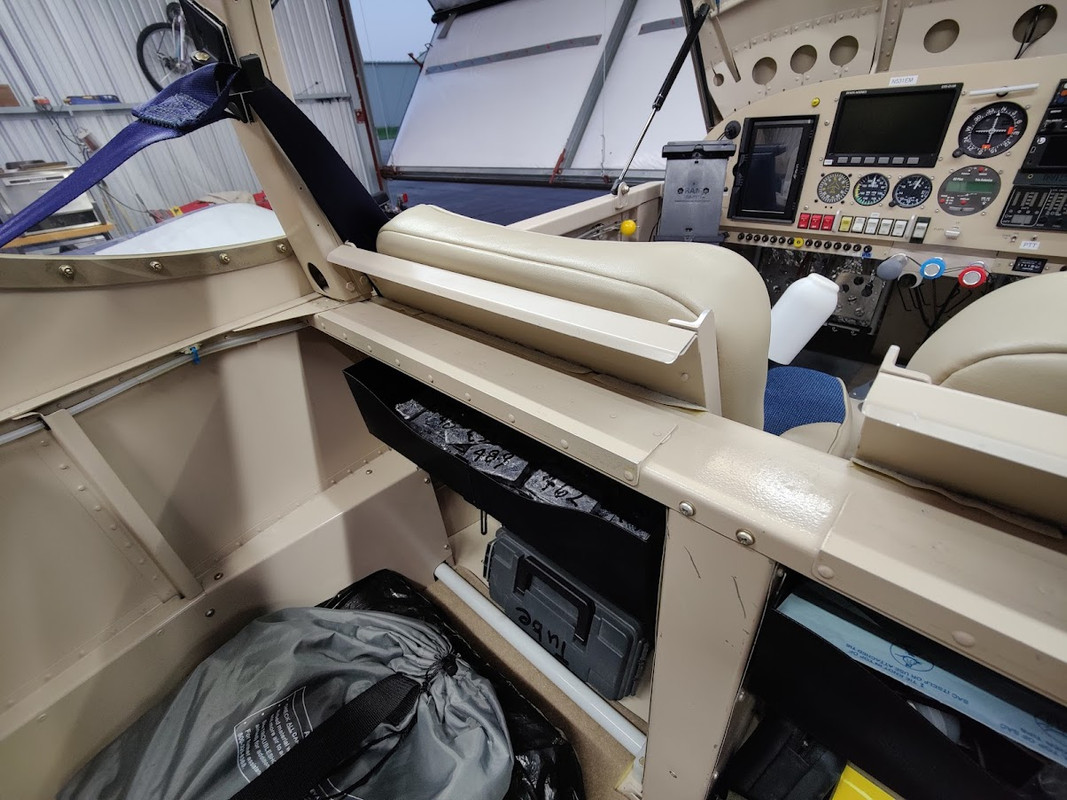
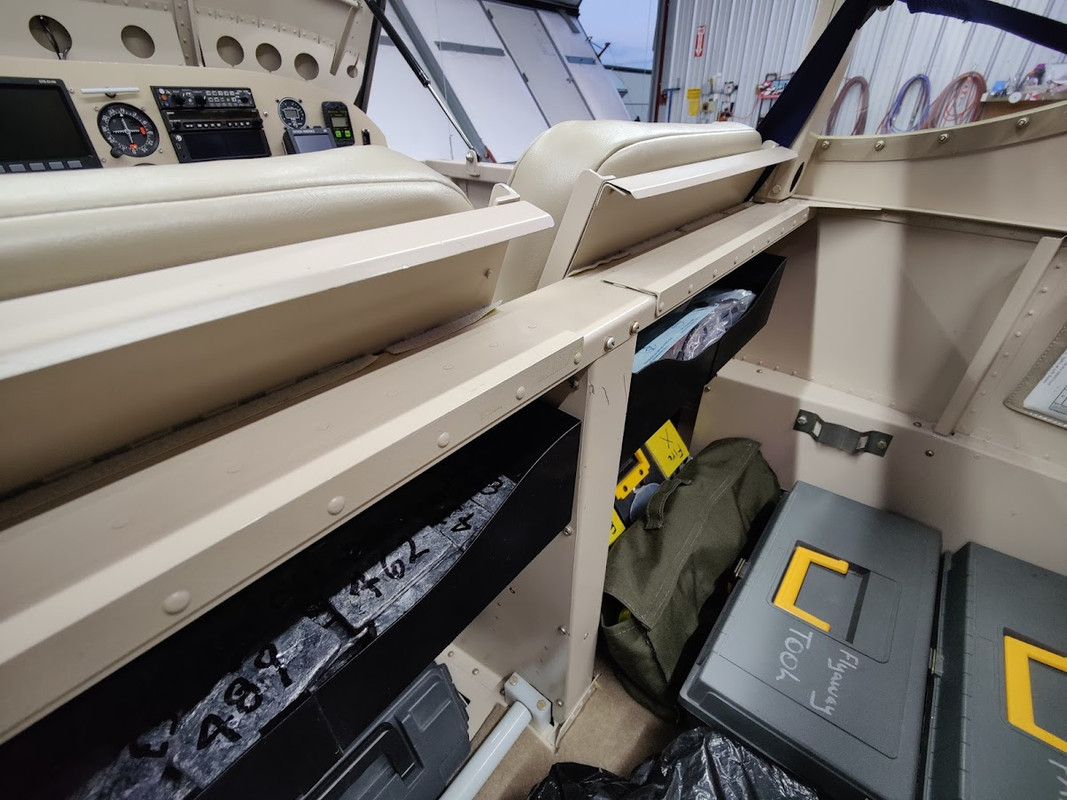
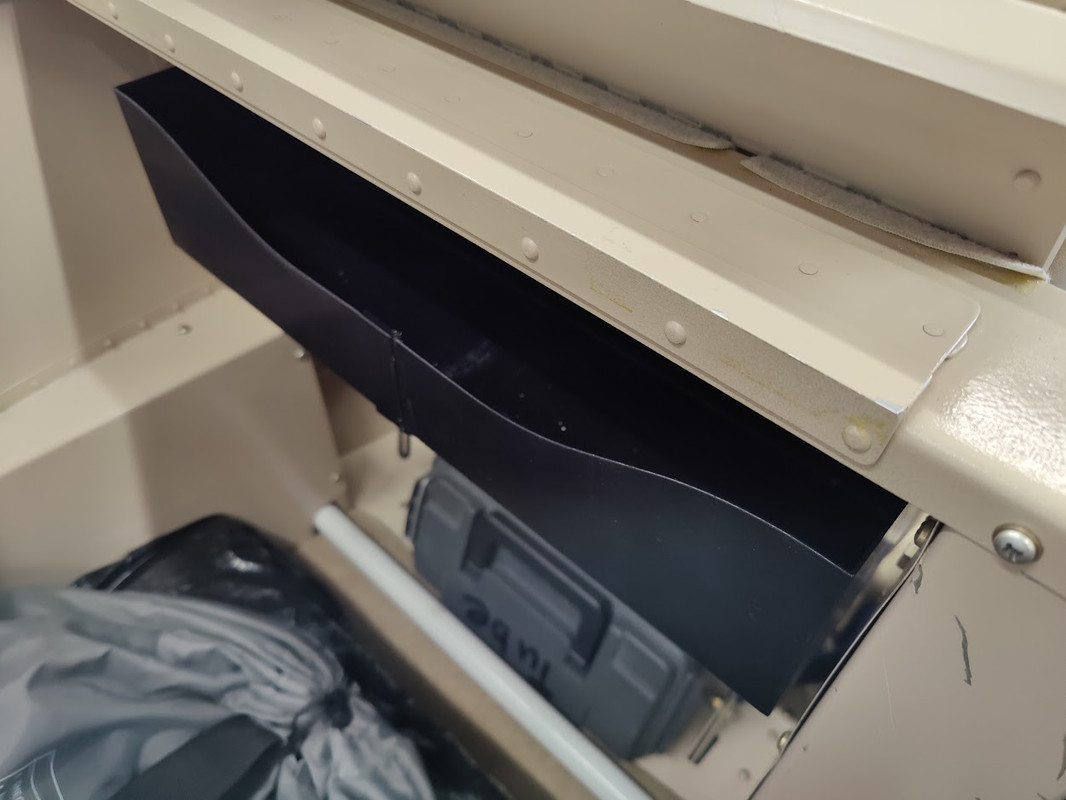
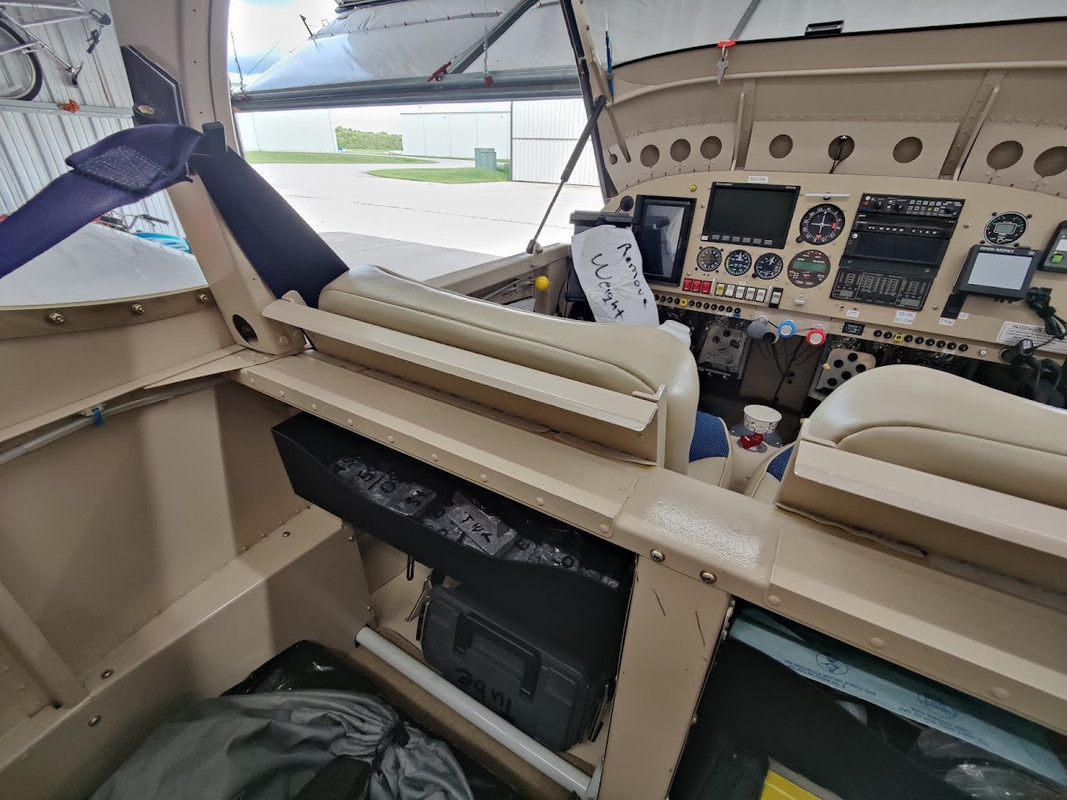
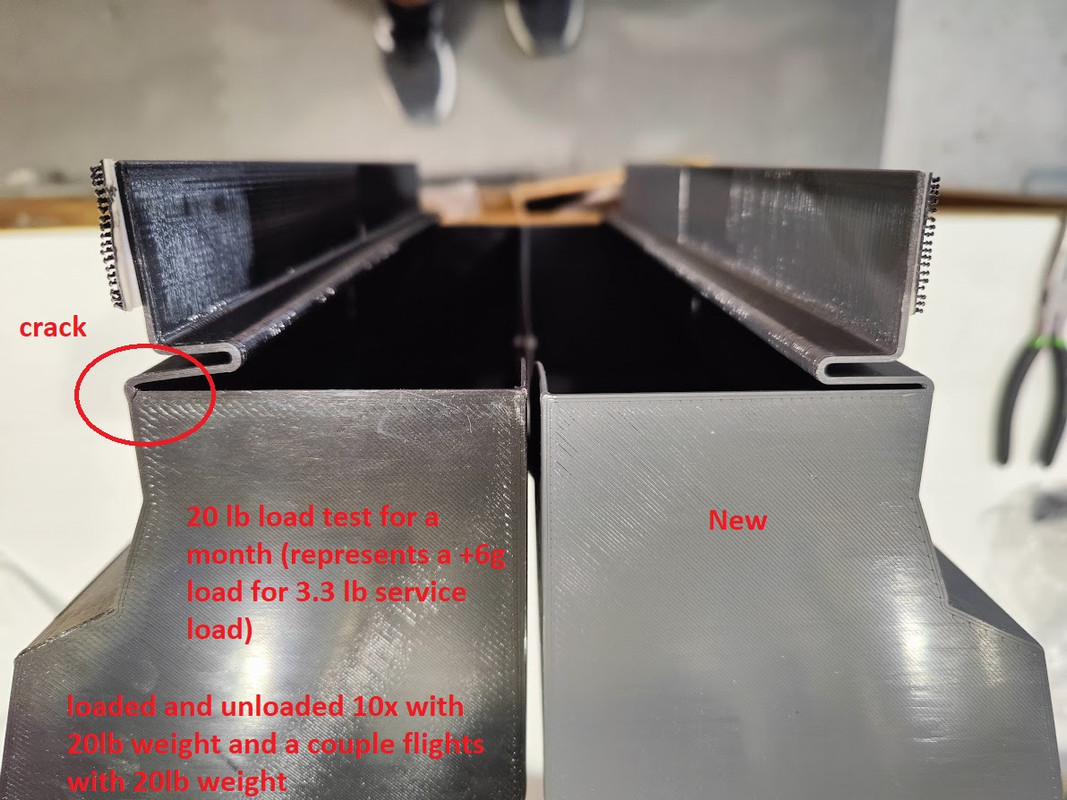
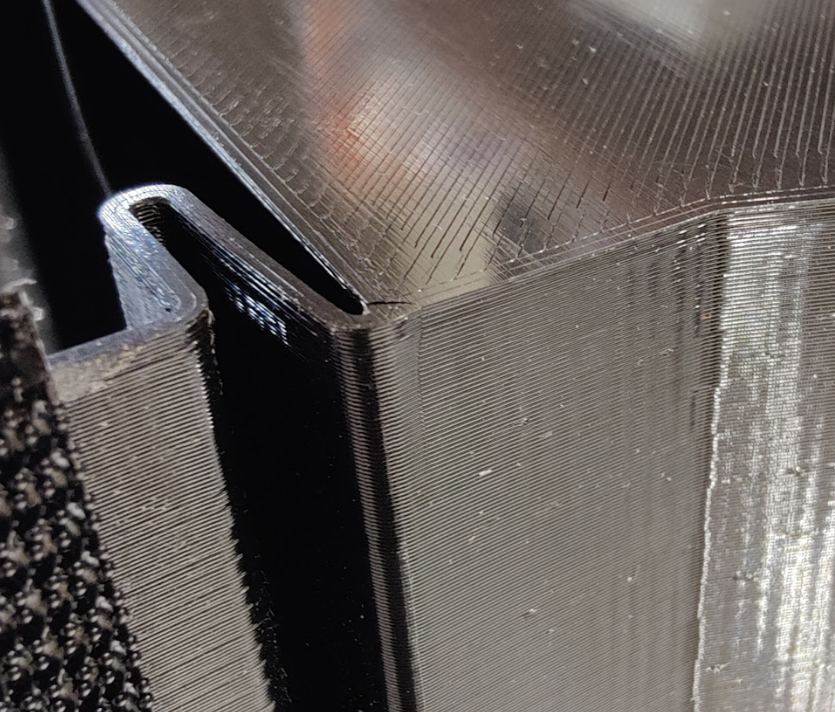
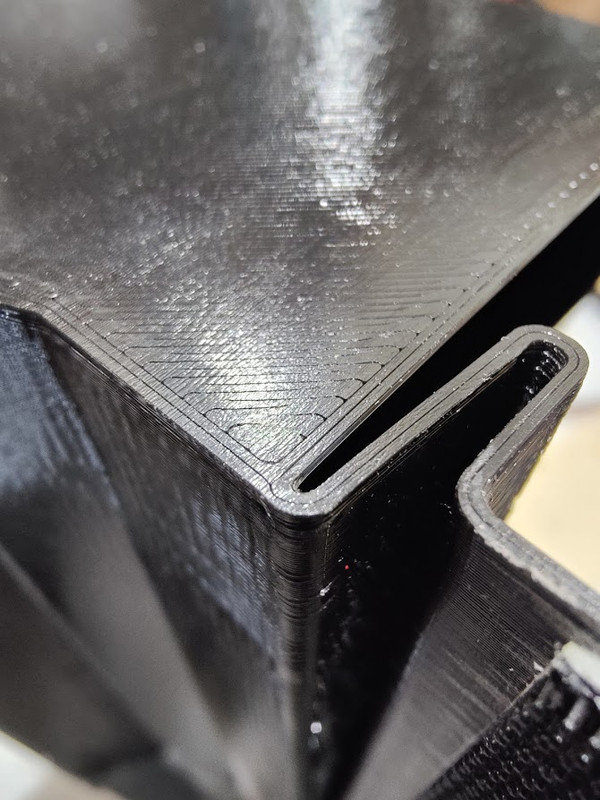
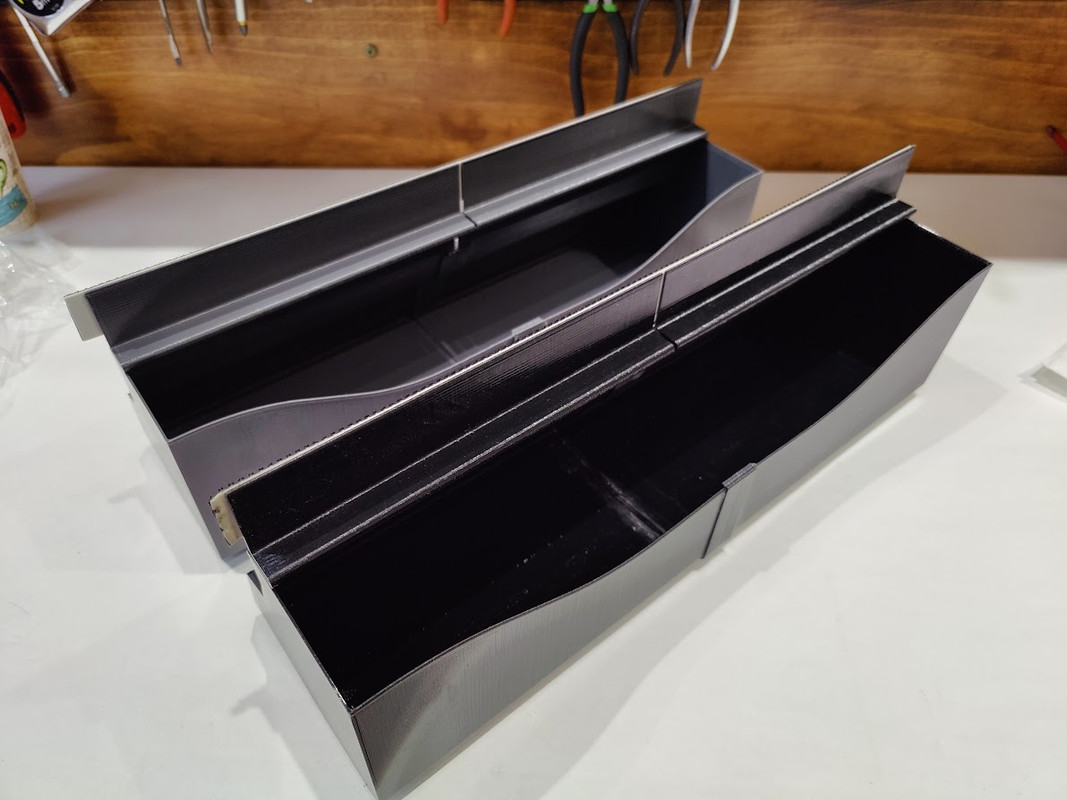
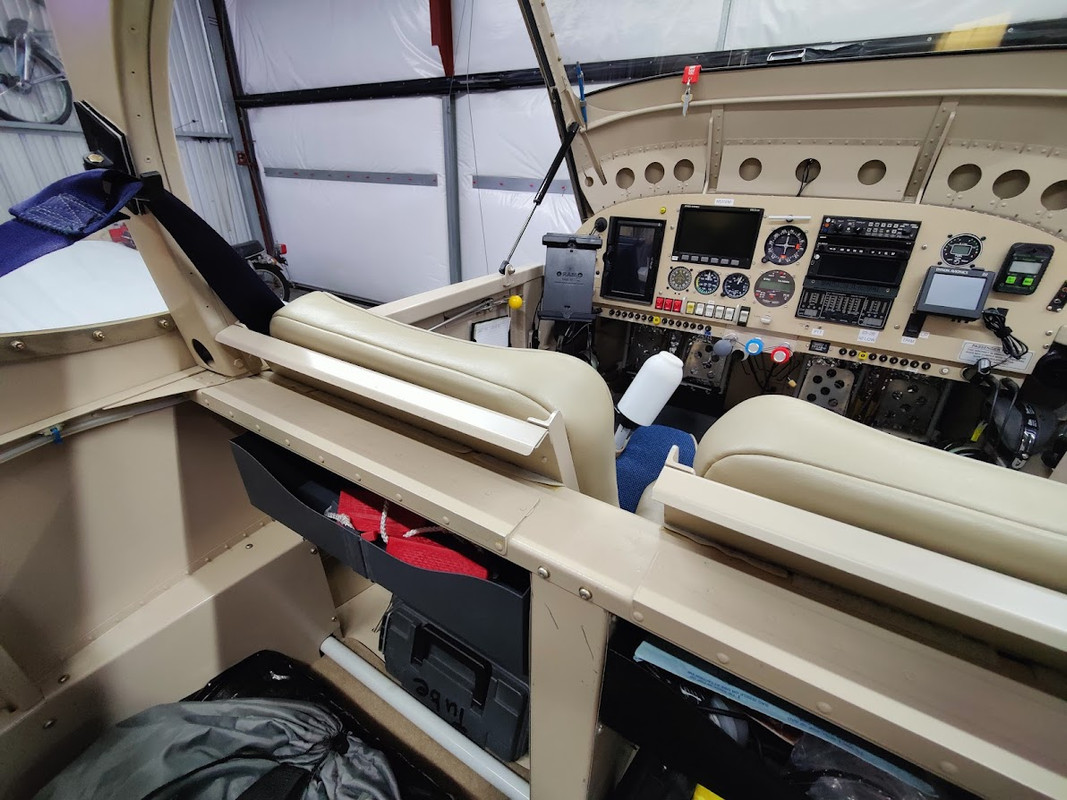
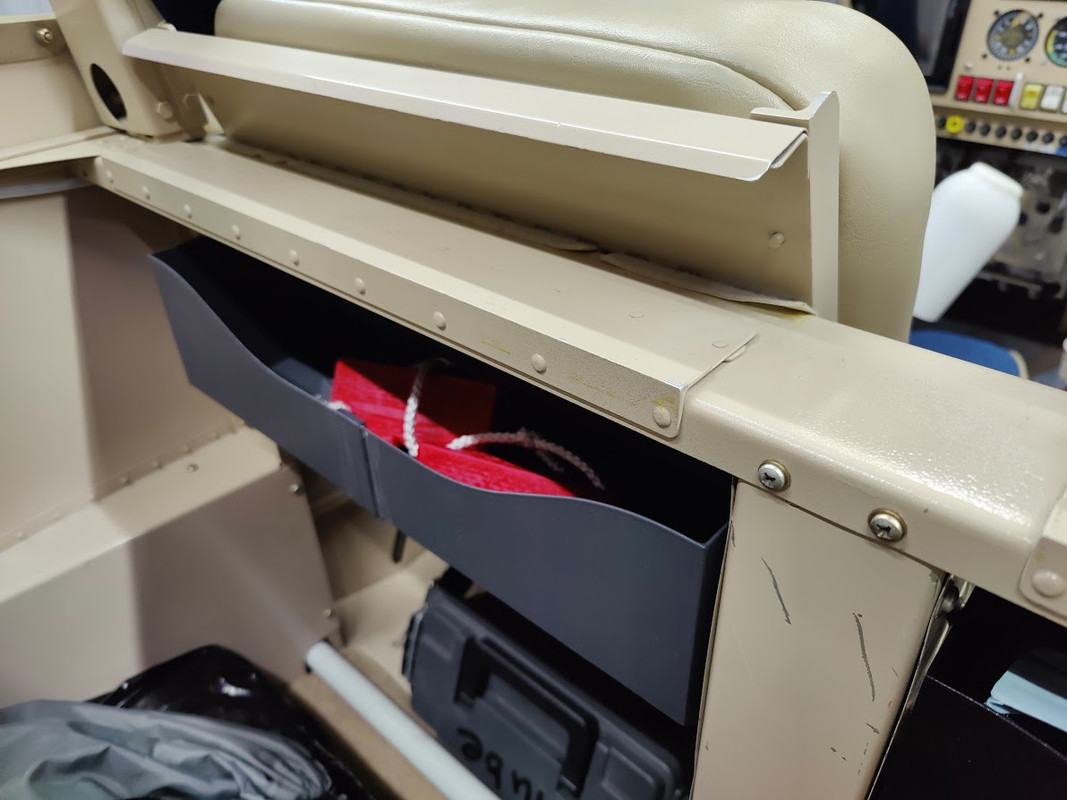
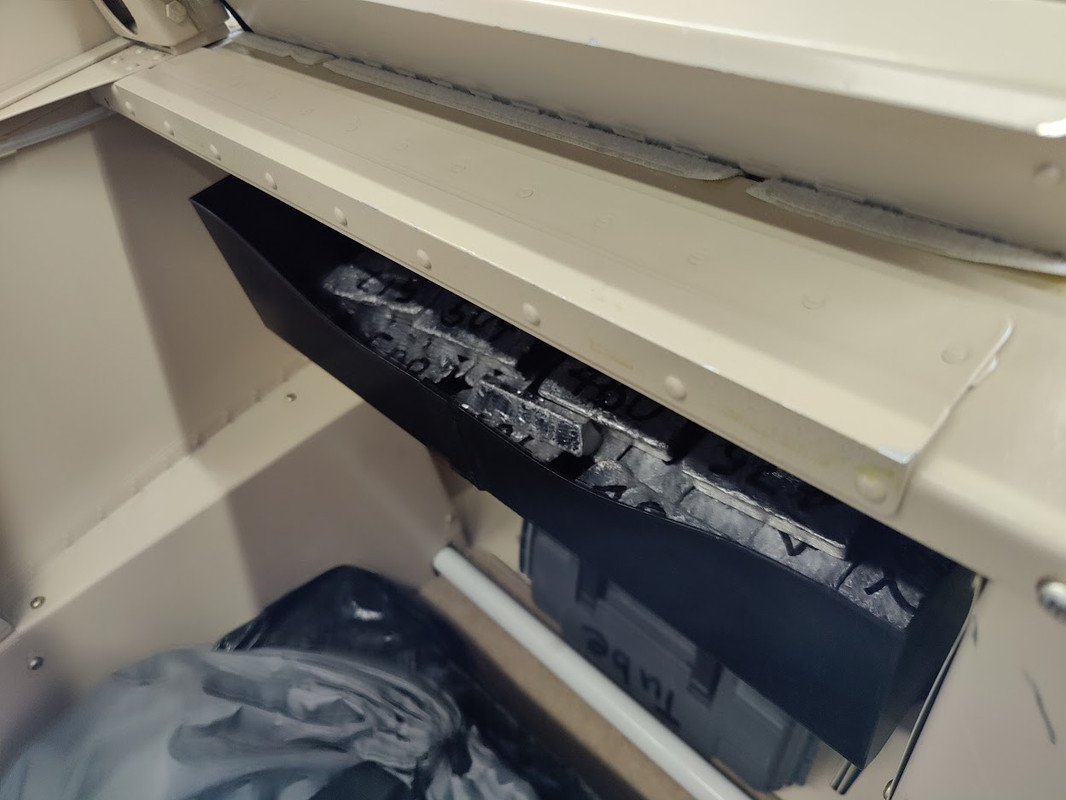
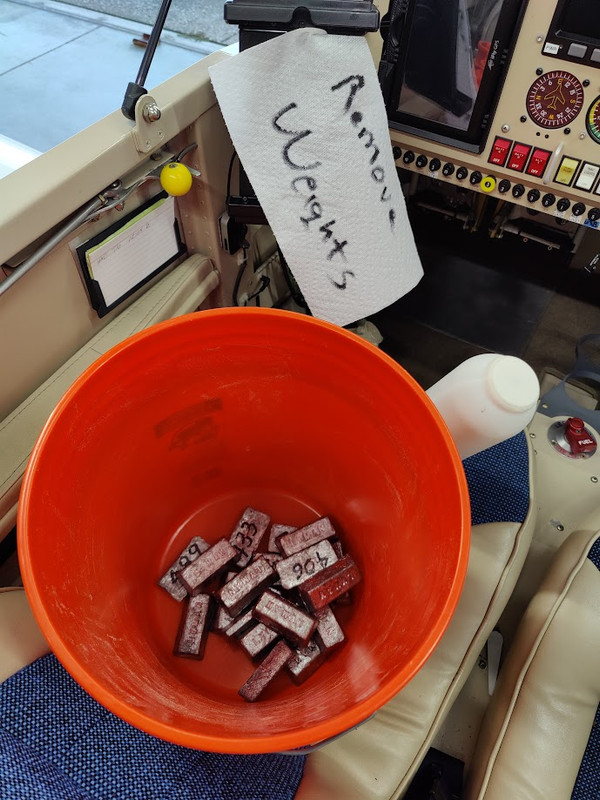
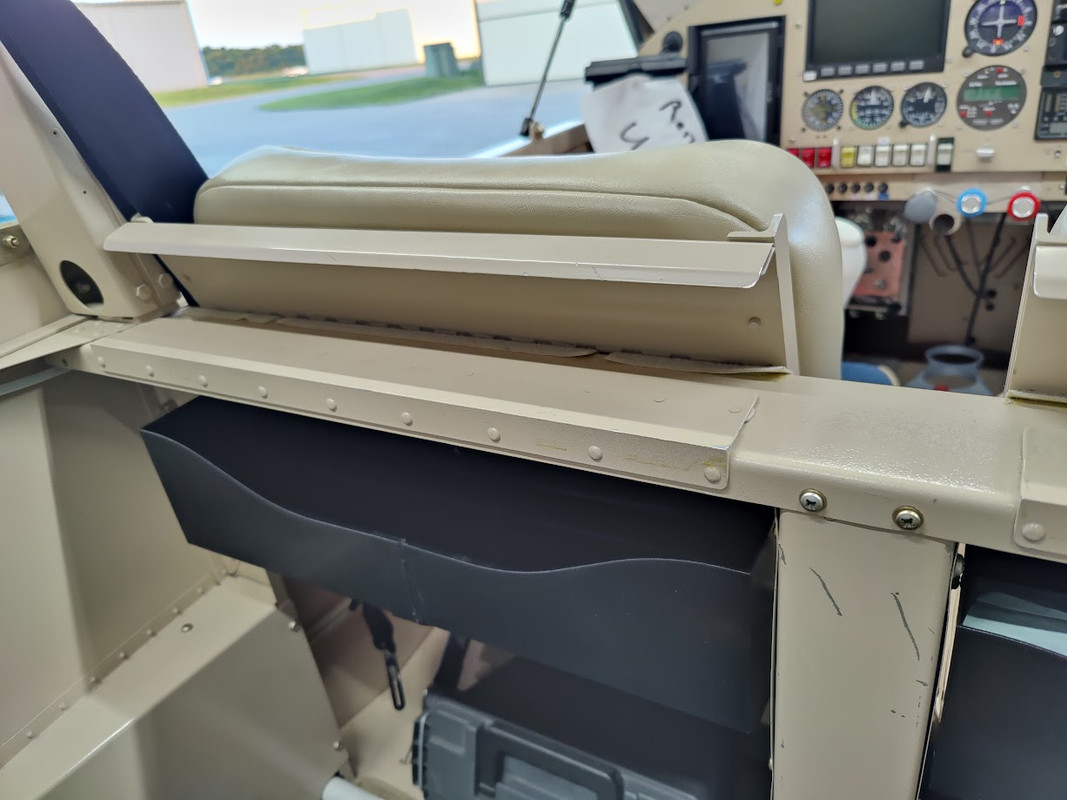
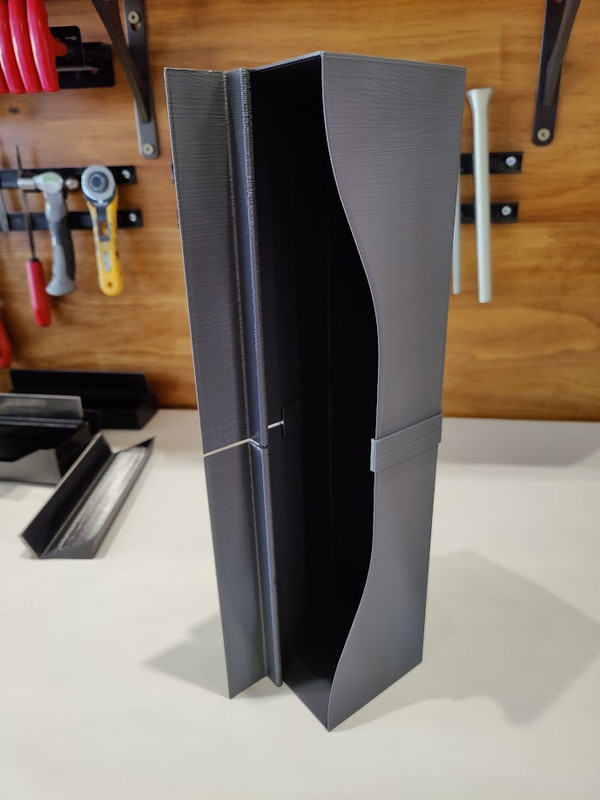
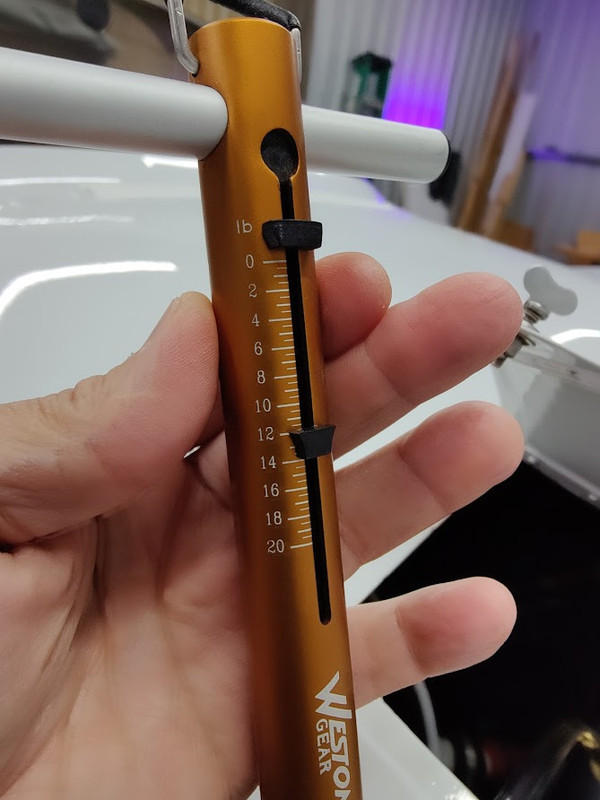
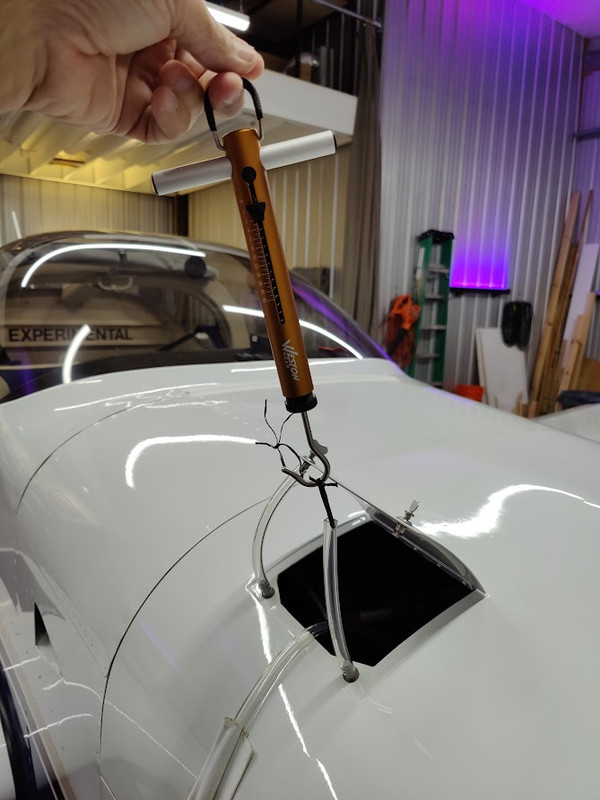
seatback storage tray..... day 2, 20 lb load test. well, I screwed the pooch and forgot to remove the lead weights before today's flight. I did a couple zooms and it was moderately bumpy. the landing was OK. I remembered the lead was still in the tray about halfway into the flight. however, everything was still there in place when I got back. there's another data point. I don't know if I should remove the tray now for inspection now or wait.
Re: a couple printed widgets
Posted: Sun Aug 21, 2022 9:00 am
by A2022
seatback storage tray....day 3, I left the tray in place and inspected around the edges. looks good. unload the tray and went for a flight then reloaded the tray with the 20 lbs. everything is in perfect condition with this ultimate loading so far. load testing is ultimate 20 lb loading. this would be when the tray is loaded with 3.3 lb and pulling 6g. I am becoming faster at loading and unloading the lead weights.

Govi, Sails of Joy
https://youtu.be/Z5rrmPDGuWM
***********************
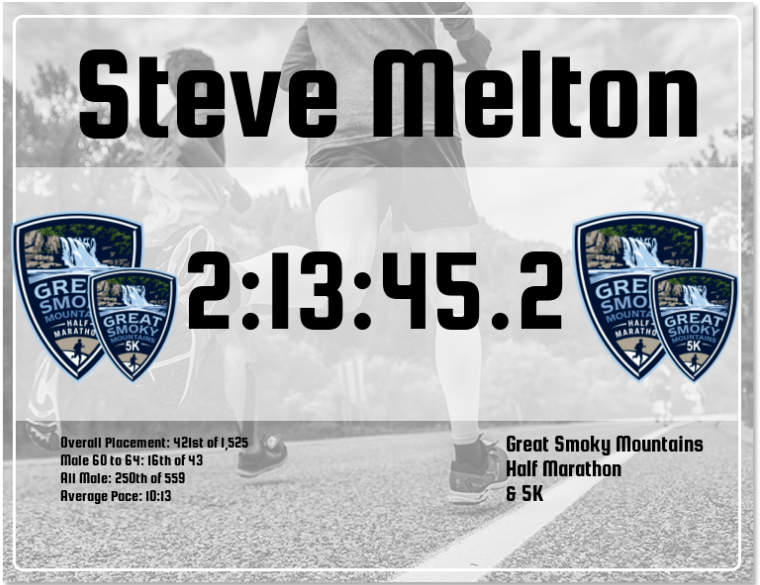
Smoky Mountain Half Marathon getting close and I'm getting pumped.... a beautiful place to run!
hitting 50 pushups per day after a run.
the plan is same as last year.
1. fly there
2. eat like a pig to carbo load
3. run and win the race for my age group (60-64), but little chance of that because there are some world class runners there but hoping for a top 5 place
4. recover and eat like a pig
5. fly home
from what I have found, when you show your race results to the doctor, it sure is easy to get signed off for a medical.

Re: a couple printed widgets
Posted: Mon Aug 22, 2022 8:48 pm
by A2022
Re: a couple printed widgets
Posted: Wed Aug 24, 2022 9:22 pm
by A2022
Re: a couple printed widgets
Posted: Sat Aug 27, 2022 8:28 pm
by A2022
Re: a couple printed widgets
Posted: Sat Aug 27, 2022 8:32 pm
by A2022
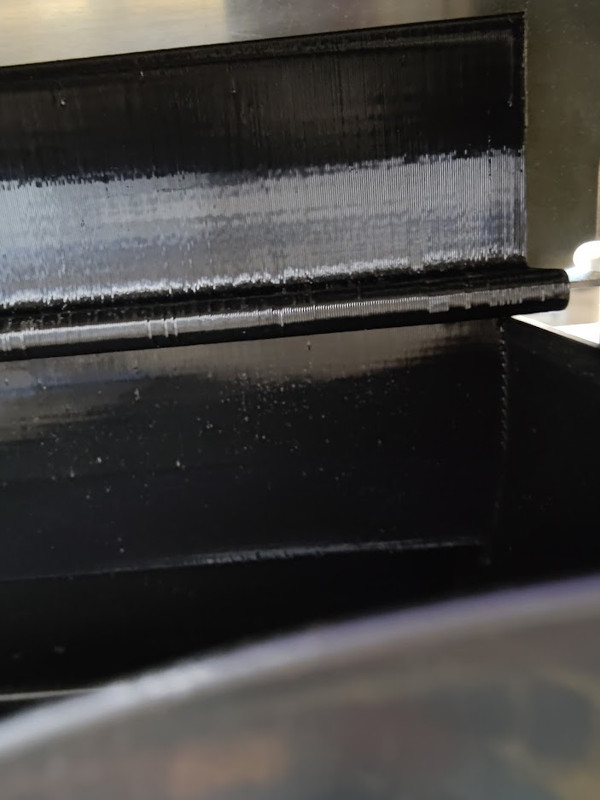
seatback storage tray..... day ?, 20 lb load test. day whatever, I'm losing count. unload, fly and reload. hey, lifting 20 lbs into the cockpit is heavy. another seatback tray printed in dark grey this time.
The Dualz - Your eyes (Live) /// Anjunadeep
https://youtu.be/bu4AP-HQWbU
Re: a couple printed widgets
Posted: Thu Sep 01, 2022 7:24 pm
by A2022
thinking about an exterior acoustic hush panel for the exhaust pipes to keep noise and vibration outside the aircraft. I may attach it with velcro.
but I don't want air to get under it, however. I will probably have to make this from two pieces.

Re: a couple printed widgets
Posted: Fri Sep 02, 2022 6:06 pm
by A2022
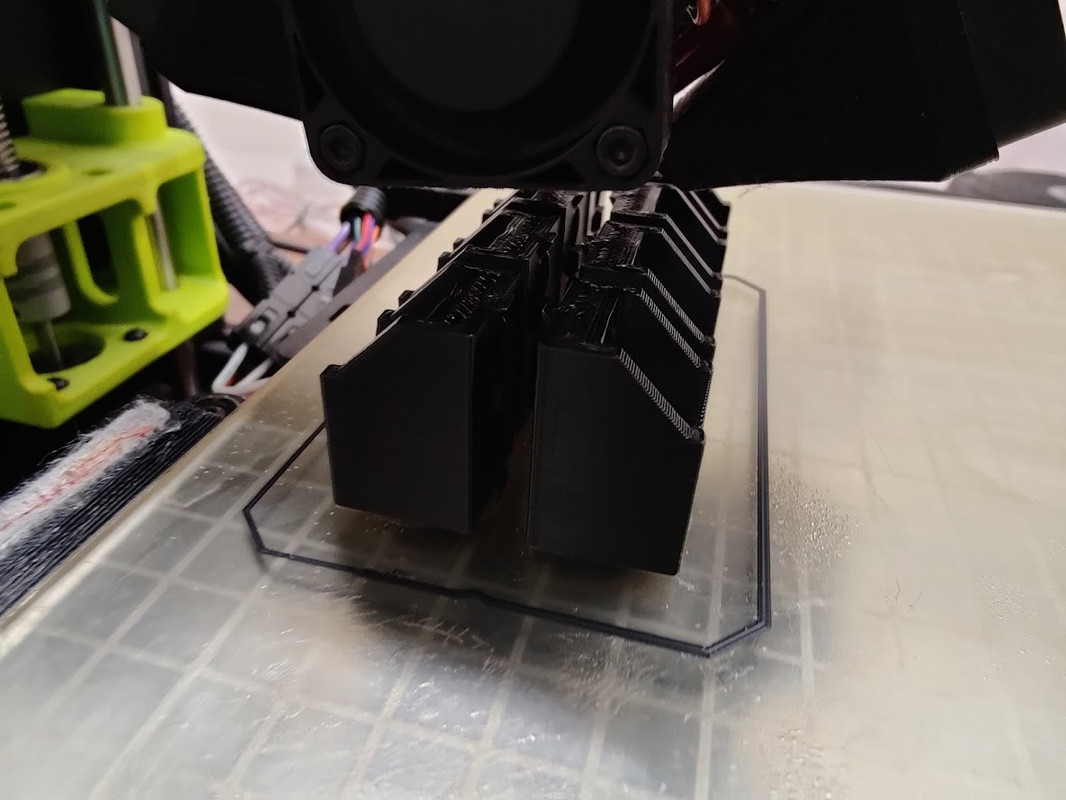
in-process parallel printing some brackets. if you print using this method, it is good to have the printed parts close together to minimize travel moves.
Tinlicker - Rebirth (Ft. Hero Baldwin) [Official Video]
https://youtu.be/owNOQeplt0Q

Re: a couple printed widgets
Posted: Sat Sep 03, 2022 12:03 pm
by A2022
ABS complex part. printed well in a heated chamber. ABS is a good printing material if you can exhaust the fumes.

Re: a couple printed widgets
Posted: Mon Sep 05, 2022 5:57 pm
by A2022
Re: a couple printed widgets
Posted: Mon Sep 12, 2022 1:36 pm
by A2022
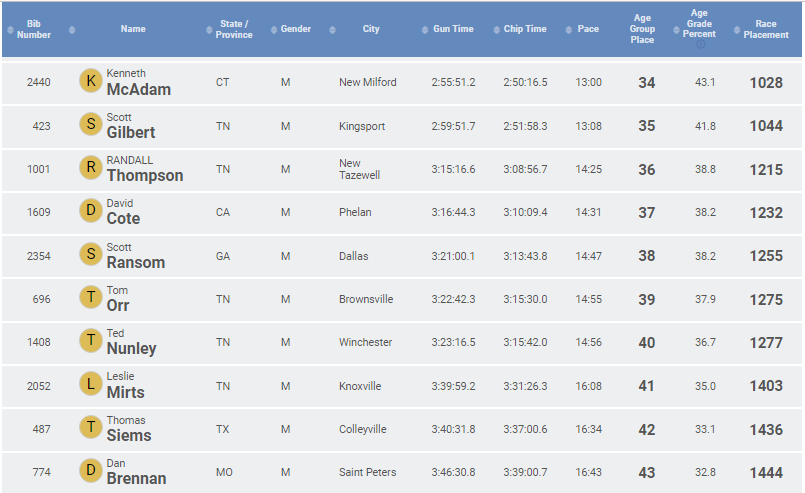
half marathon results. I could not break into the top five. I still suck. maybe next year!
at this rate, I'm going to need to run until I'm 75 to get into the top five.....
but hey, my wife and I had a really fun time pretending we are athletes. she was 3:21 walking. Knoxville was good to us.
I only have one excuse; it was raining so hard my music shorted out at mile 8. I need "mah music"!
**************************
made it to the finish line. it was a wet one. need to find a way to become faster. thinking about next year!

Re: a couple printed widgets
Posted: Tue Sep 13, 2022 2:05 pm
by A2022
Re: a couple printed widgets
Posted: Tue Sep 27, 2022 5:56 pm
by A2022
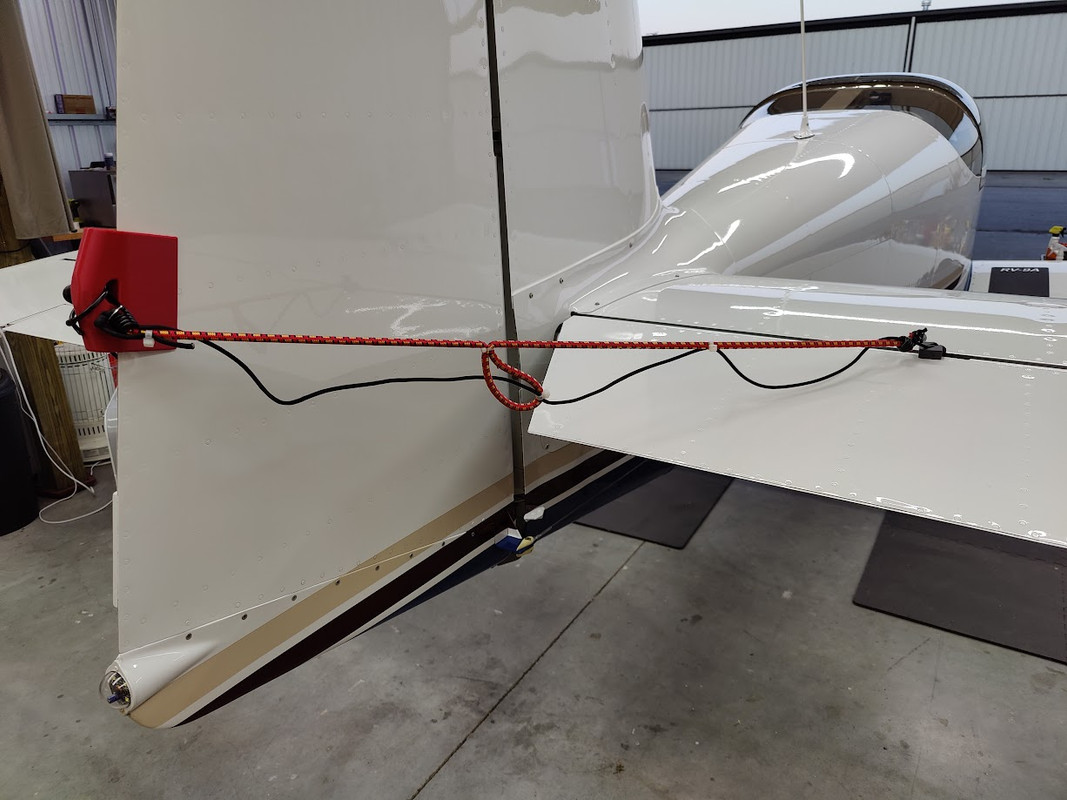
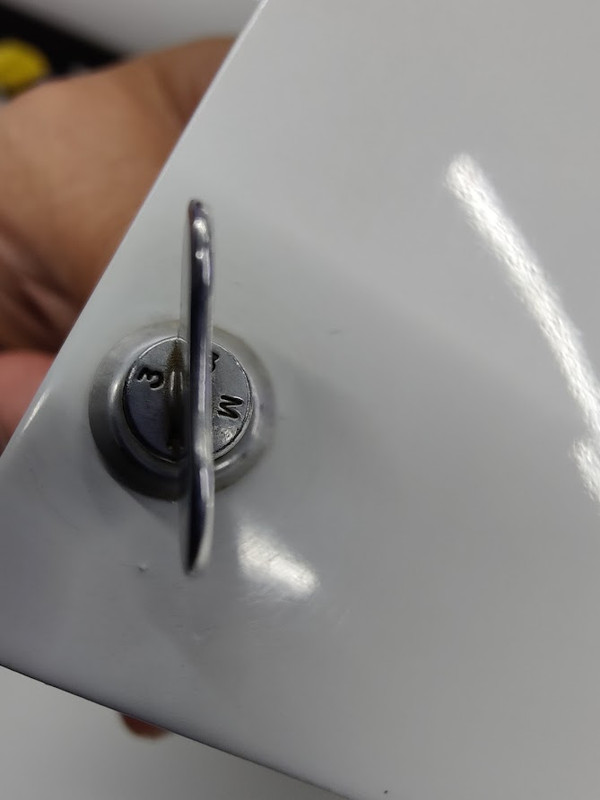
headset mounted with 3M Dual Lock (hard Velcro) is still holding after a year. the first test survived exactly one year and used 4.5 yr old 3M Dual Lock that was sitting on a shelf in the hangar. this time I used 1 yr old Dual Lock and scuffed the backside of the mount. it is exposed to hot and cold of a non-conditioned hangar in Ohio and has some vibration from the air compressor. the weight the mount is supporting is 1.1 lb at the end of the arm. the test will continue.....
Re: a couple printed widgets
Posted: Thu Sep 29, 2022 6:44 pm
by A2022
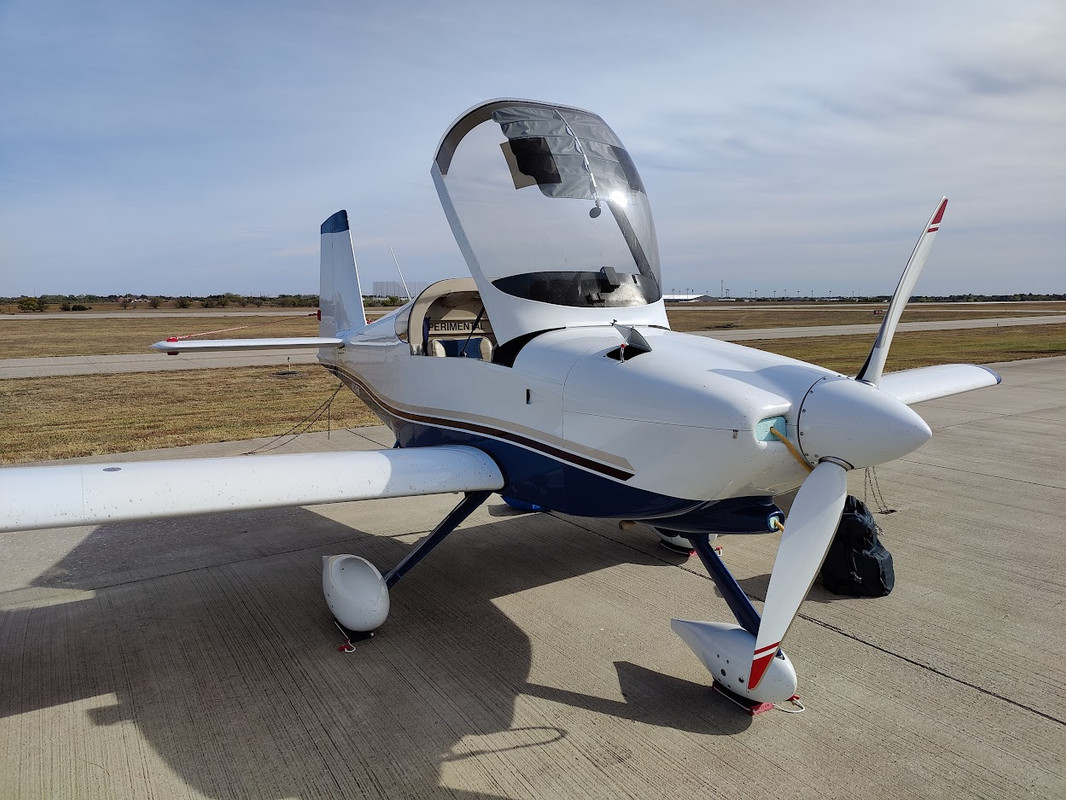
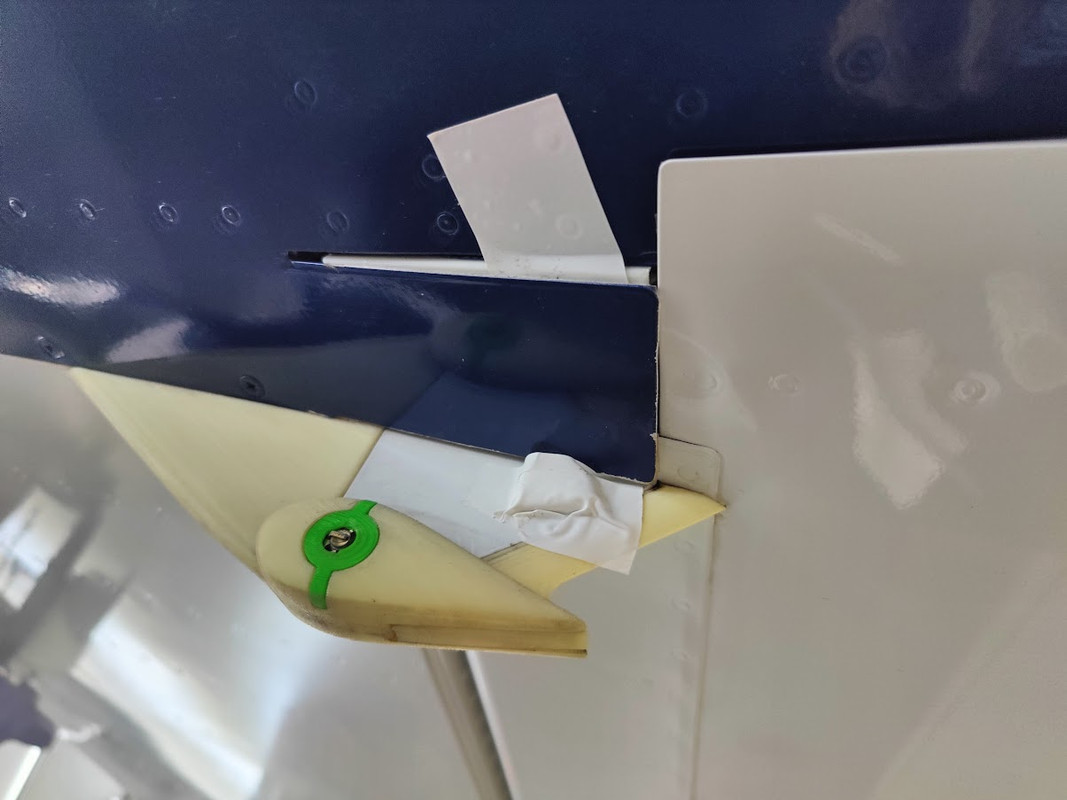
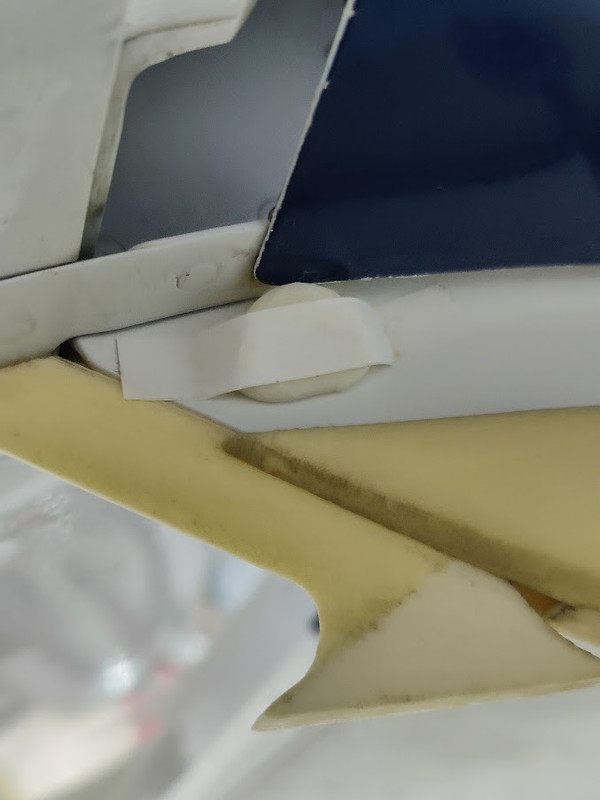
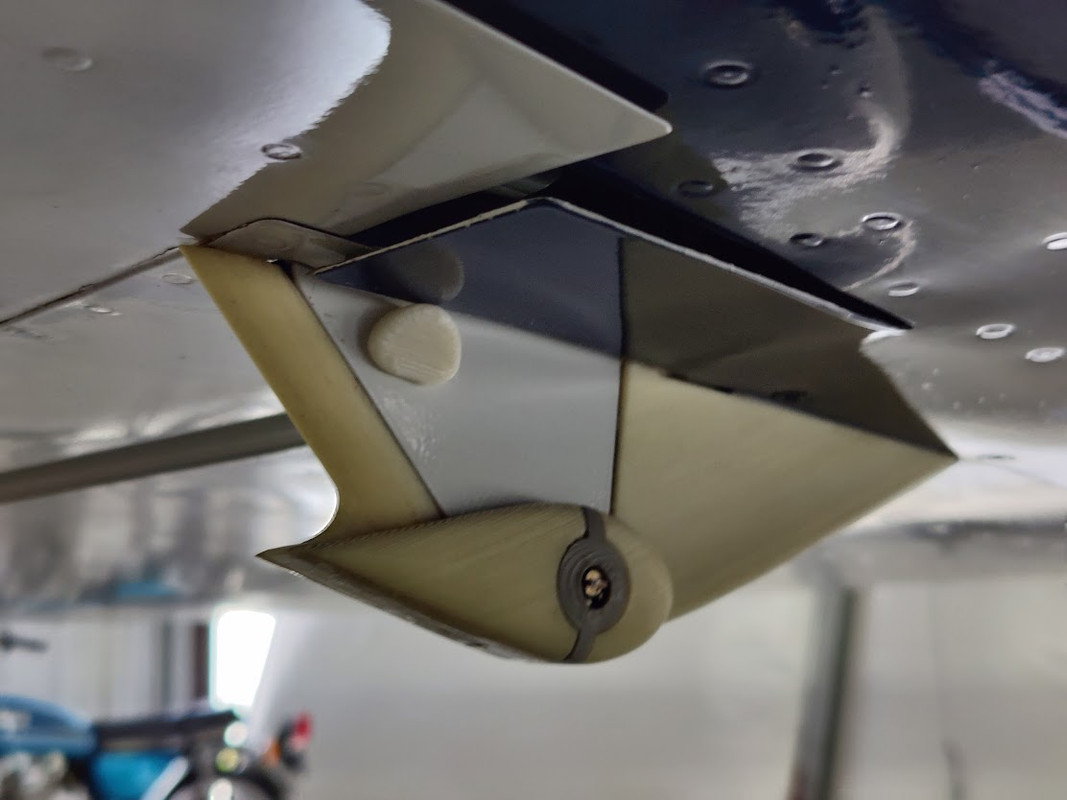
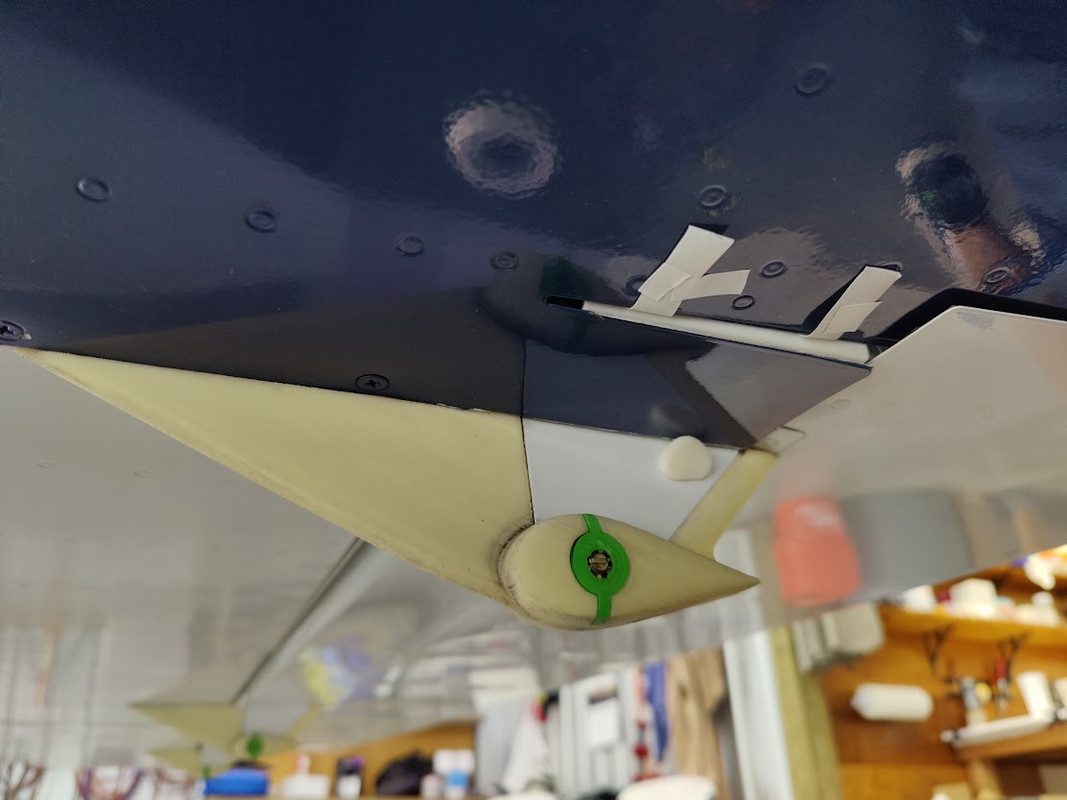
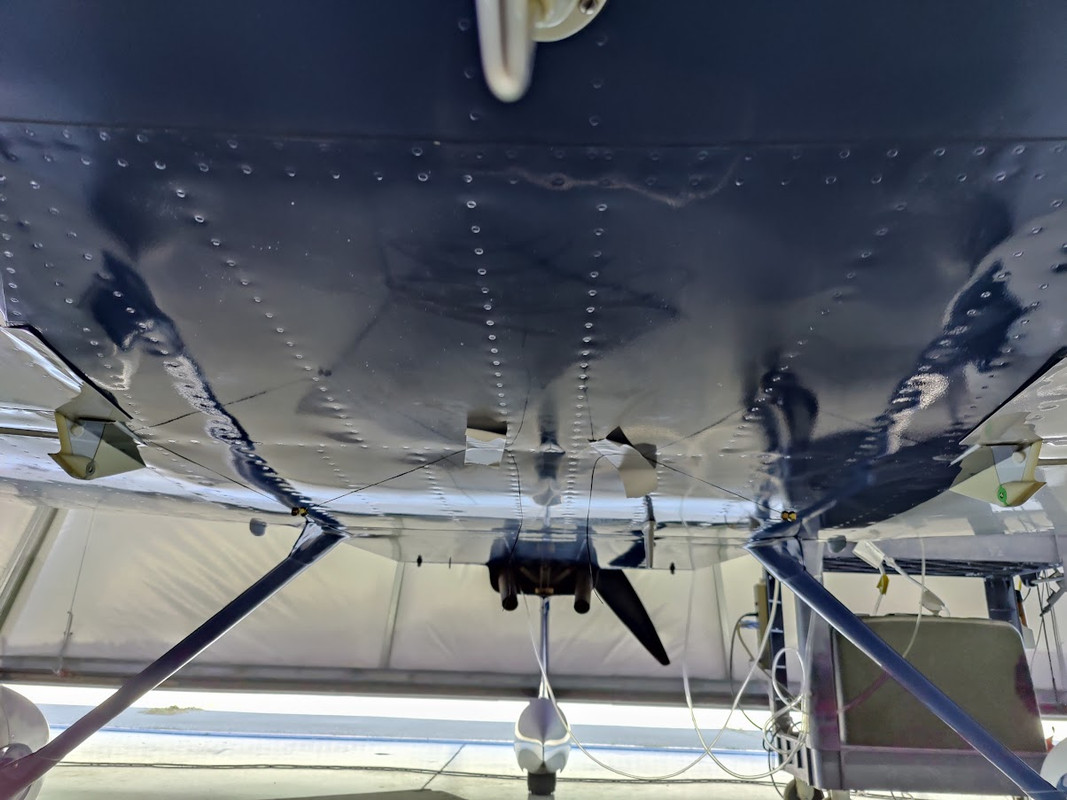
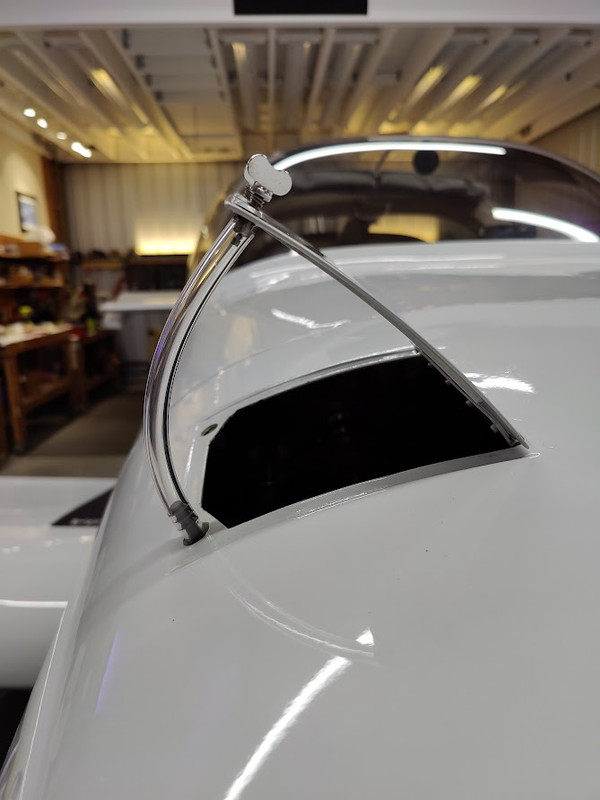
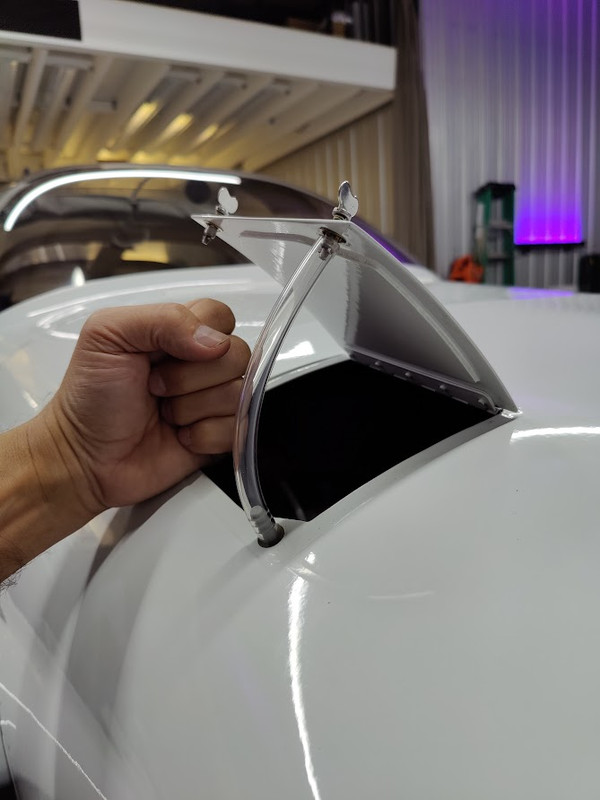
RV9 flap appendage closure. I like the RV9 flap because it is lightweight and simple with superb operability (actually, amazing, good). however, there is an appendage on the inboard side that leaves both a step and a gap. is it a real problem, no, but I want to clean it up. I don't like things fluttering in the breeze. I believe a small button shaped like a football will work and a 90-degree angle piece. I will install these plastic pieces without removing any other aircraft parts. the RV9 flap bracket fairings are original and approaching 5 yrs, if I remember correctly.
I'll probably get 3 kts from this.
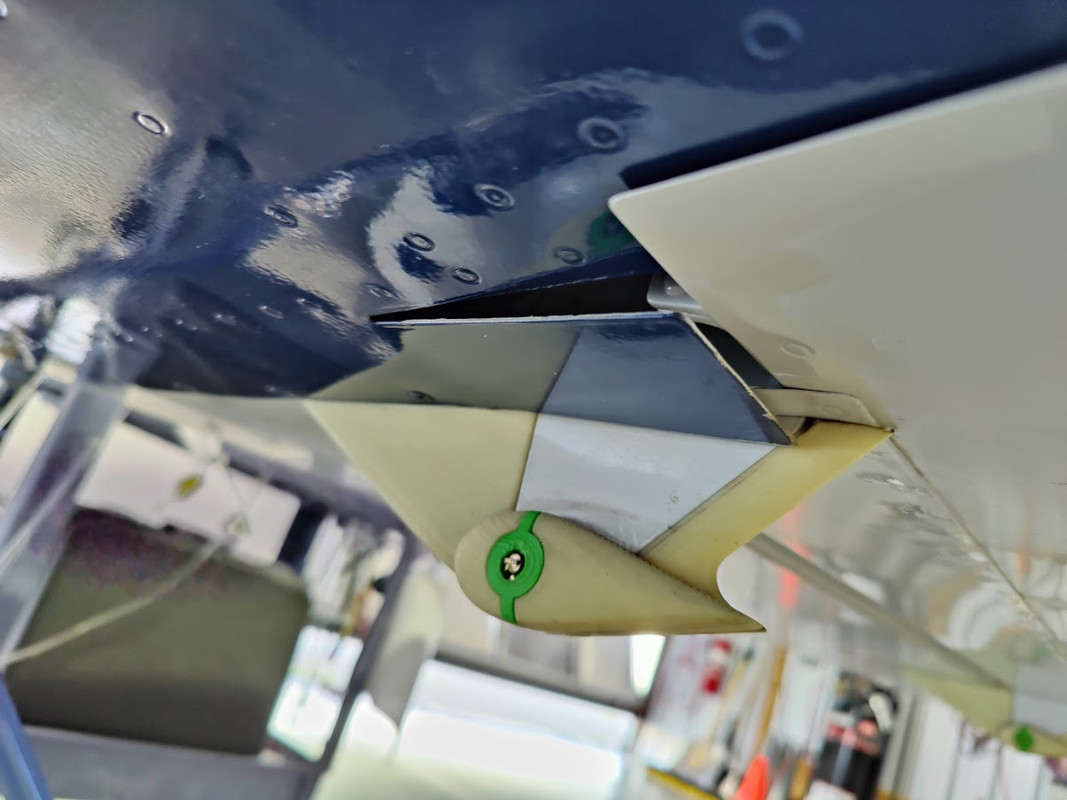


***************
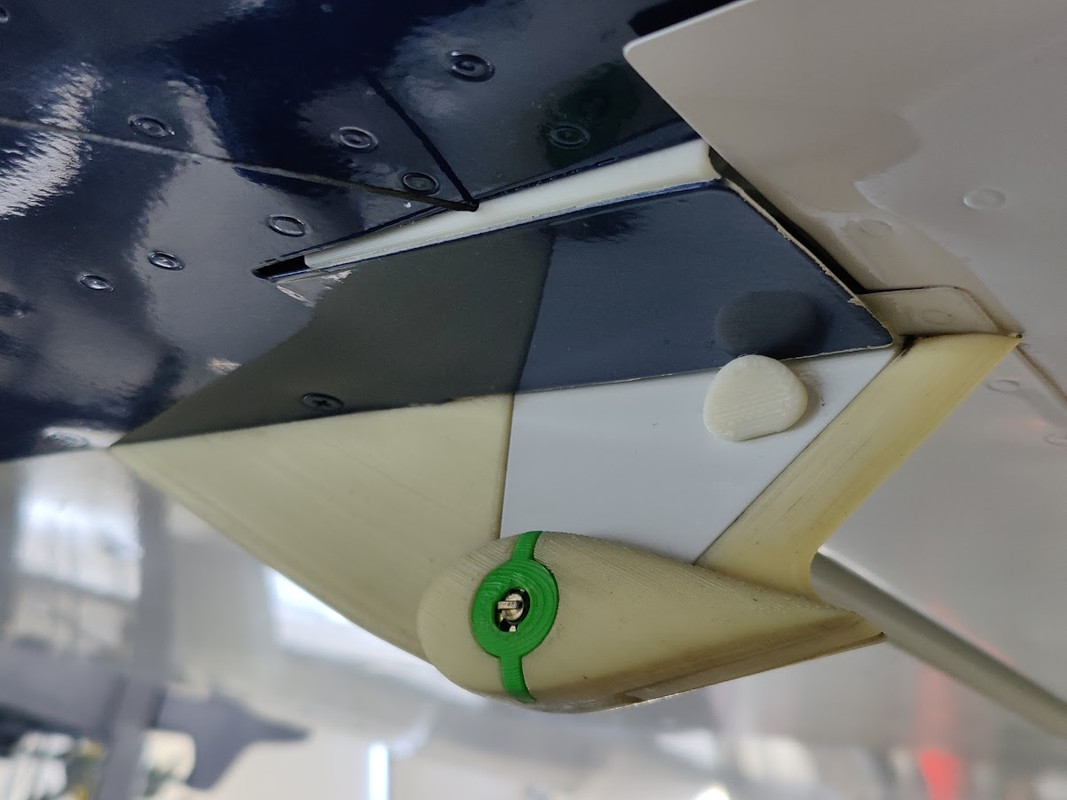
I can surely obtain 100 psi shear strength from this flexible adhesive. I didn't bother to scuff the paint, but rather just cleaned it. the button bond surface area = .237 inch ^2. 100(.237) = 23 lb capability. the force required to support the appendage = approx 0.2 lb. 23/.2 = 115 safety factor. the button is only loaded when the flaps are up, so that is relatively short duration for my aircraft. not much time for the adhesive to creep. the button should have a good long life. the plan is to set the buttons firstly, then add the angle piece to cover the slot using the same adhesive in a couple locations, doesn't need much.

****************
the bonded buttons work well but still leave a .2 gap at the aft side of the appendage. I'm OK with a .2-inch gap along the aft edge. the alternative would be to make the button a cam shape but then you would need a fixture to mount it at the correct angle. the button I used is round on the contact surface. I have bonded the angle yet because I need to make the bond surface larger, but I installed it to have a look. seems OK.


*********
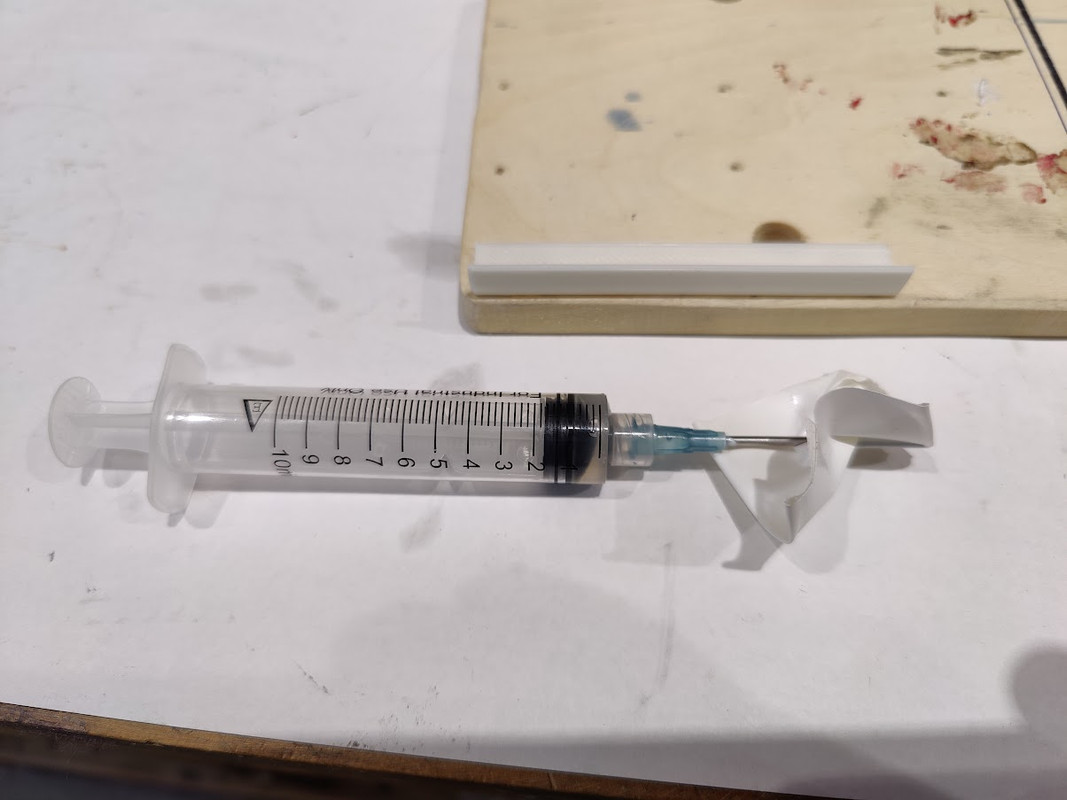
gluing the angles was easier than I thought it would be using some string and nuts for weight. syringe for applying glue precisely. let it cure for 24 hrs. hopefully, this will eliminate the NACA scoop like geometry created by the open appendage that may have been blasting air inside my flap, acting like a speed brake.

Re: a couple printed widgets
Posted: Fri Oct 07, 2022 7:32 pm
by A2022
Re: a couple printed widgets
Posted: Sat Oct 08, 2022 3:32 pm
by A2022
Re: a couple printed widgets
Posted: Mon Oct 10, 2022 7:13 pm
by A2022
Re: a couple printed widgets
Posted: Thu Oct 13, 2022 2:28 pm
by A2022
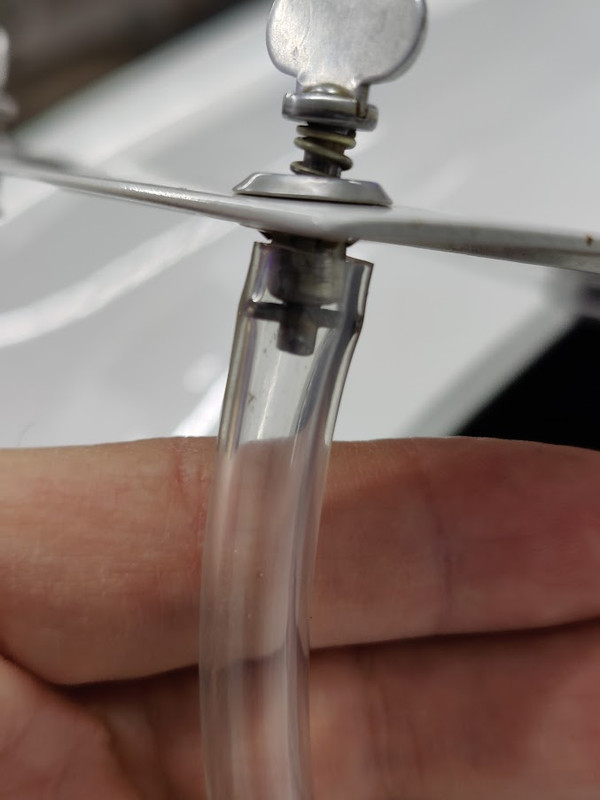
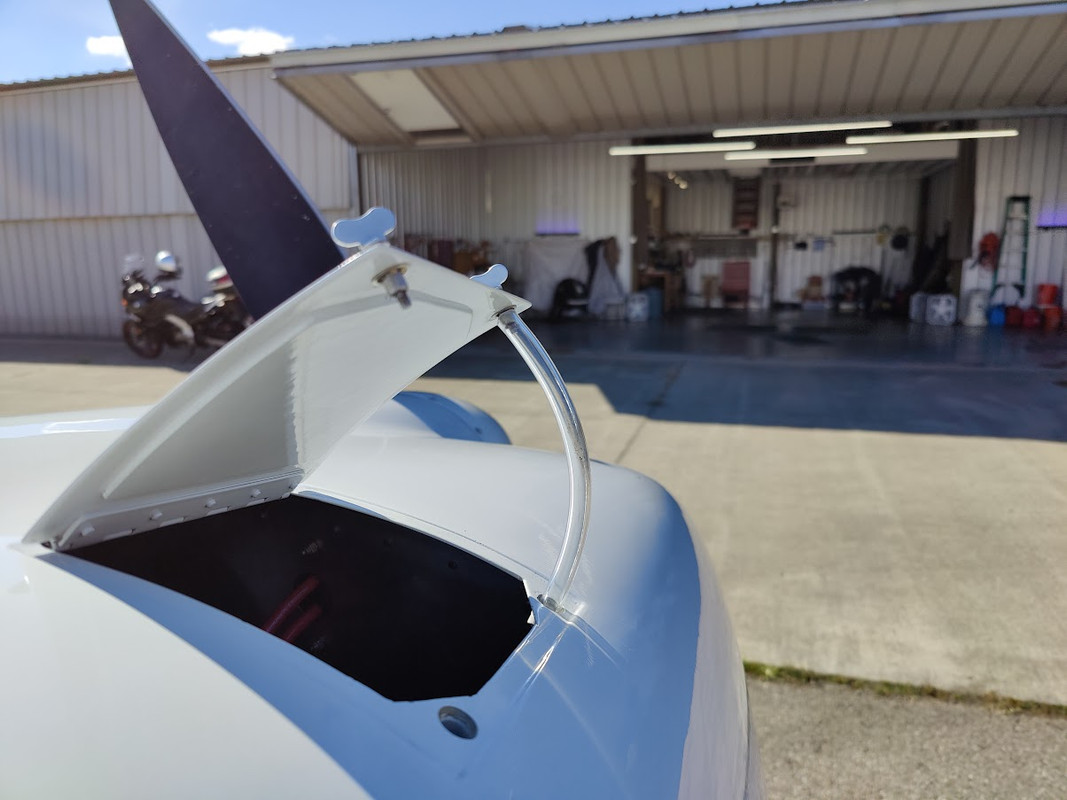
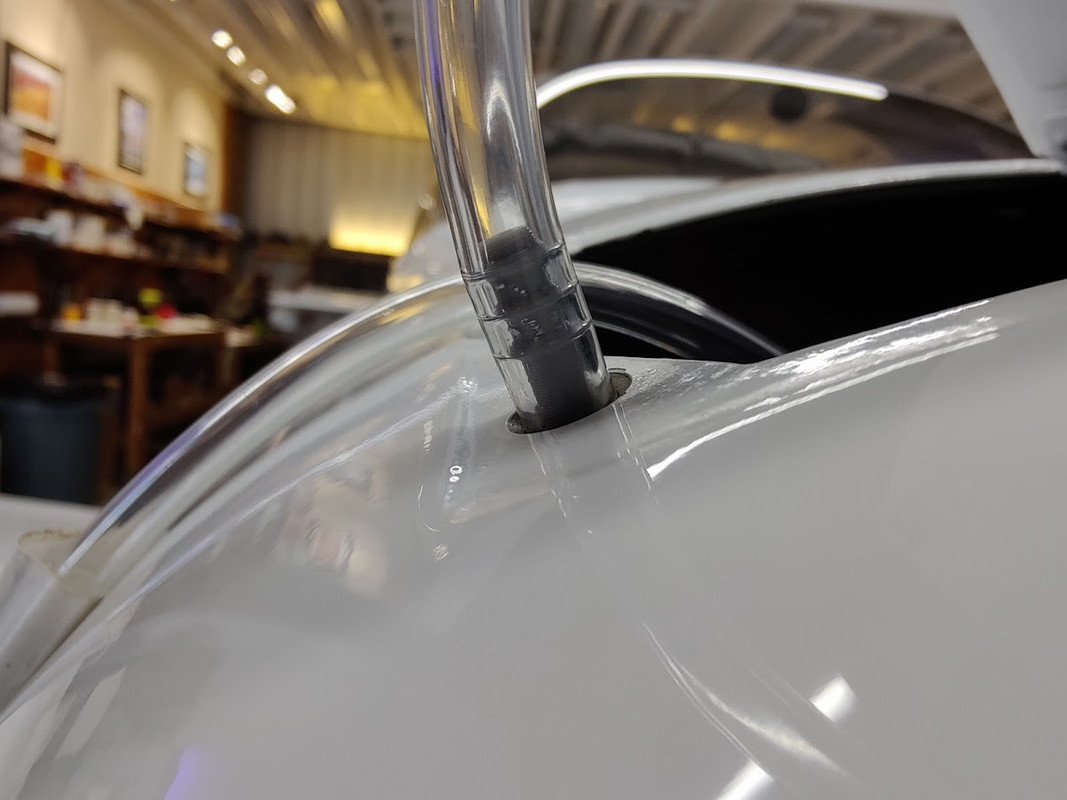
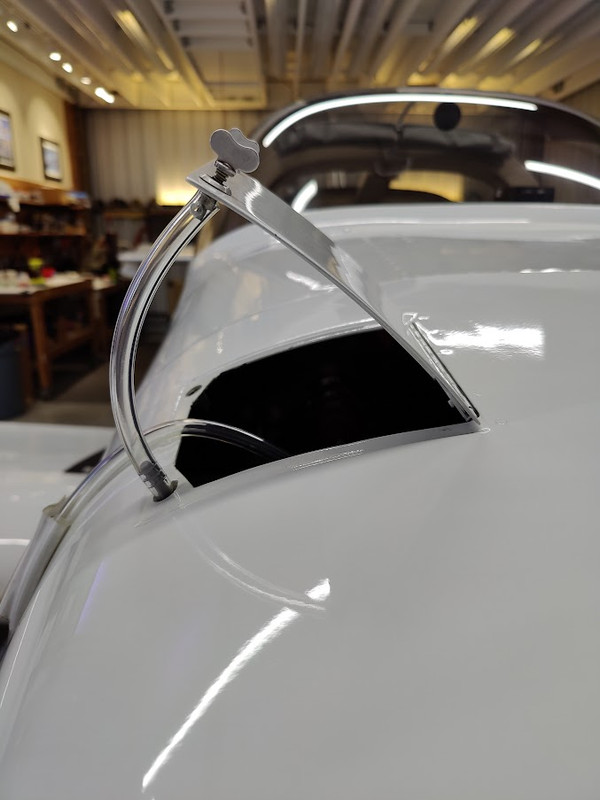
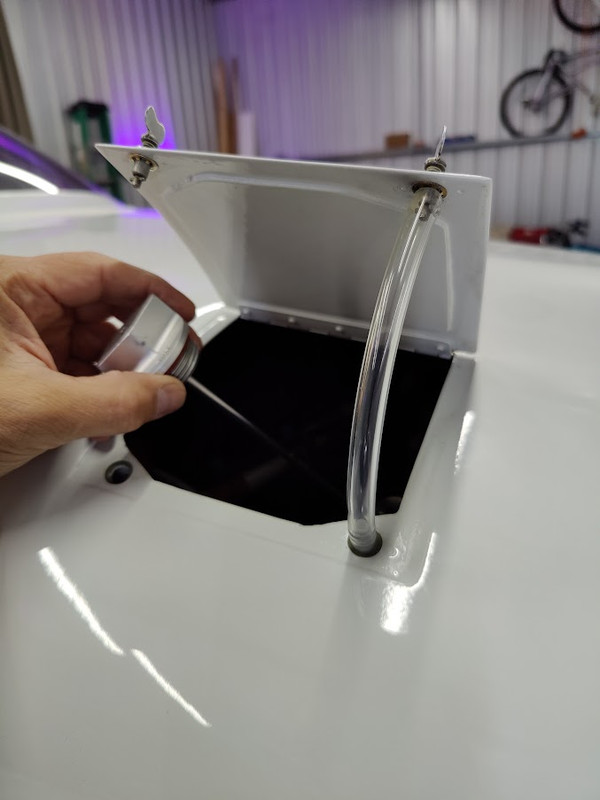
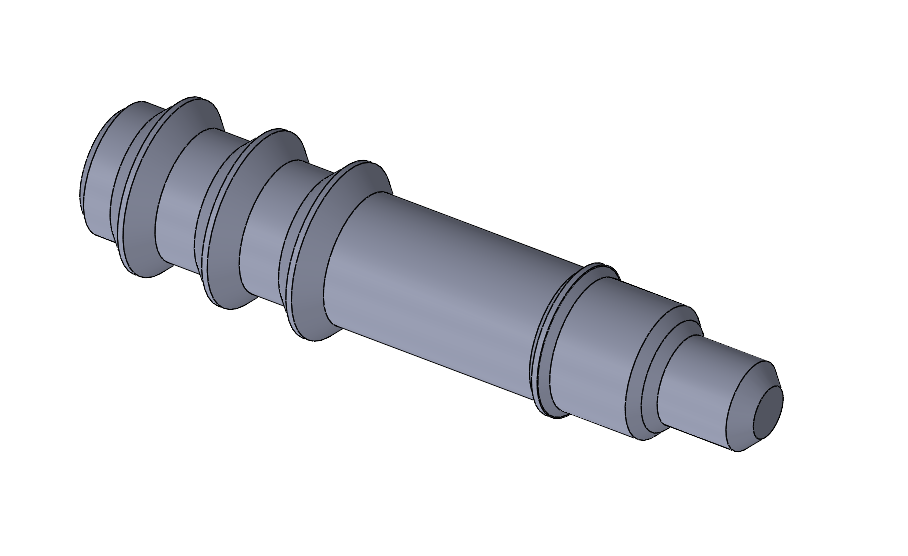
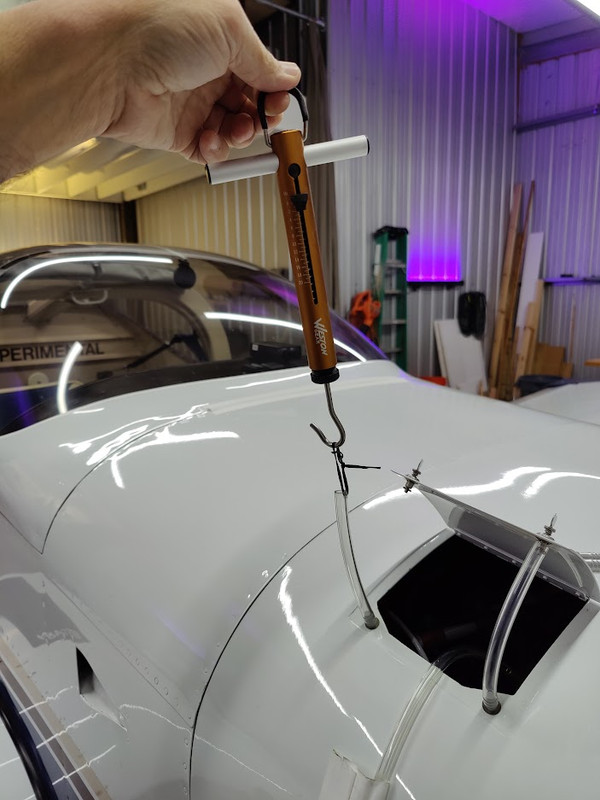
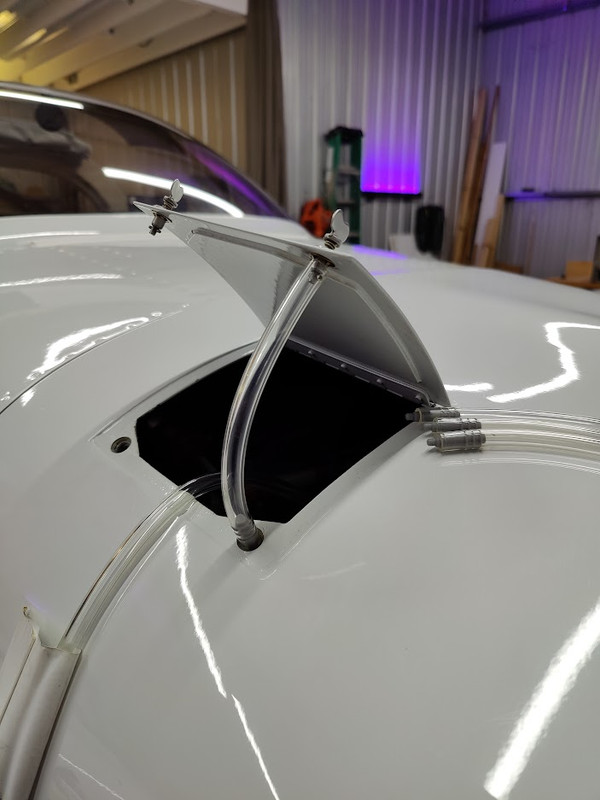
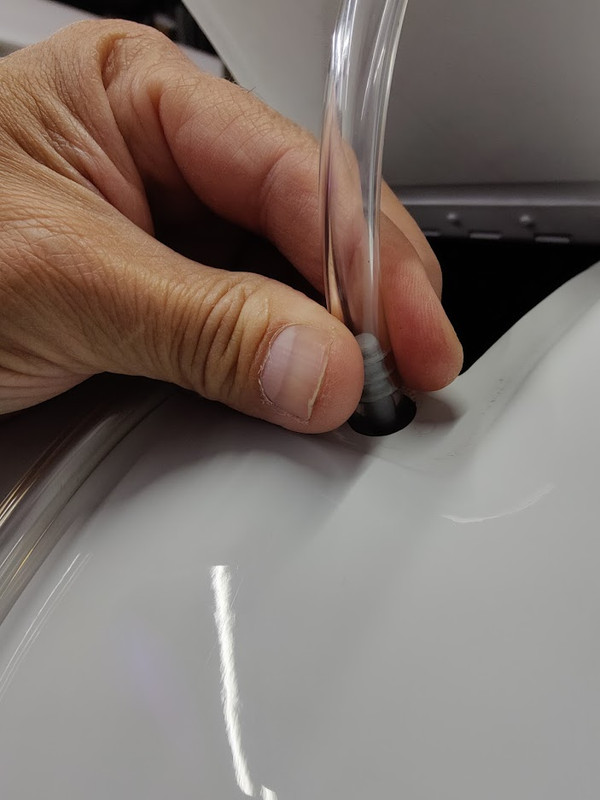
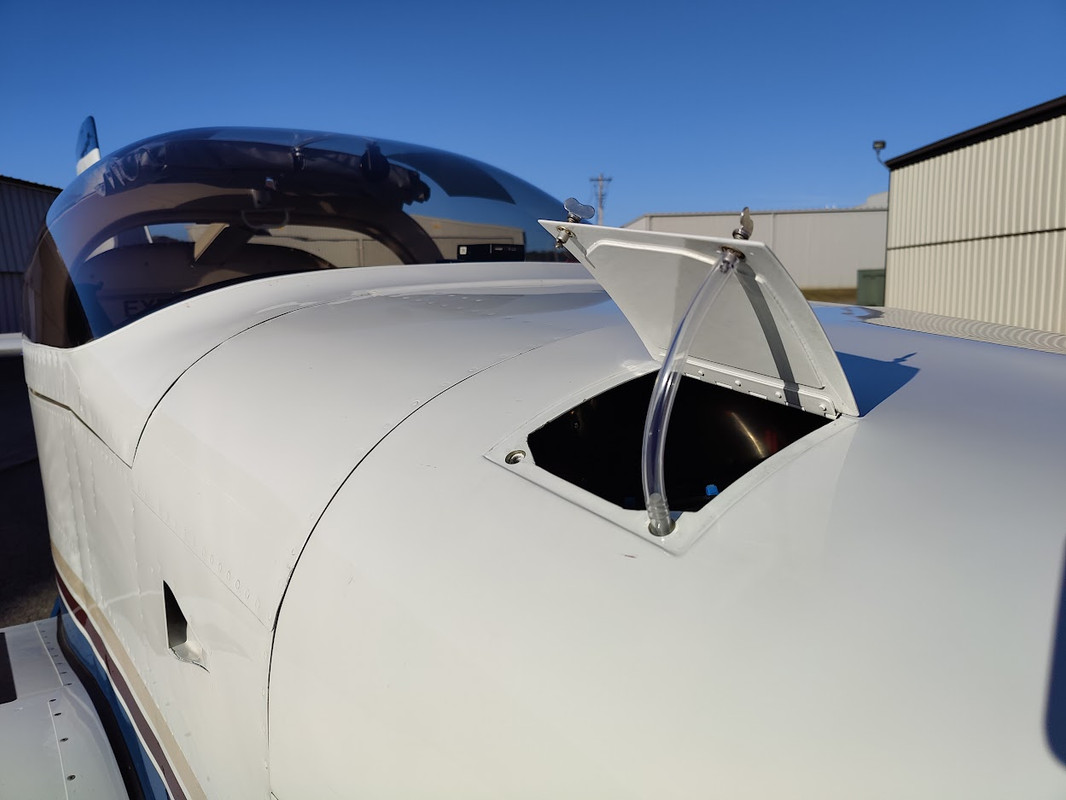
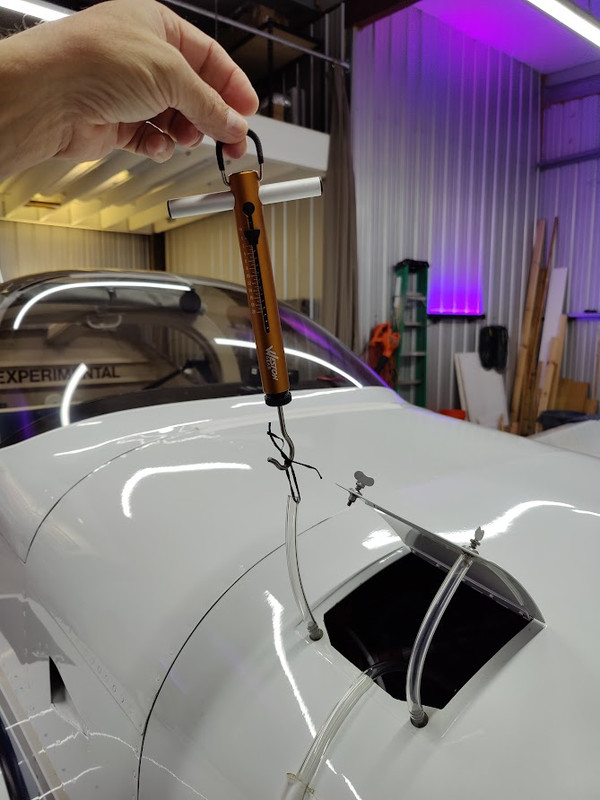
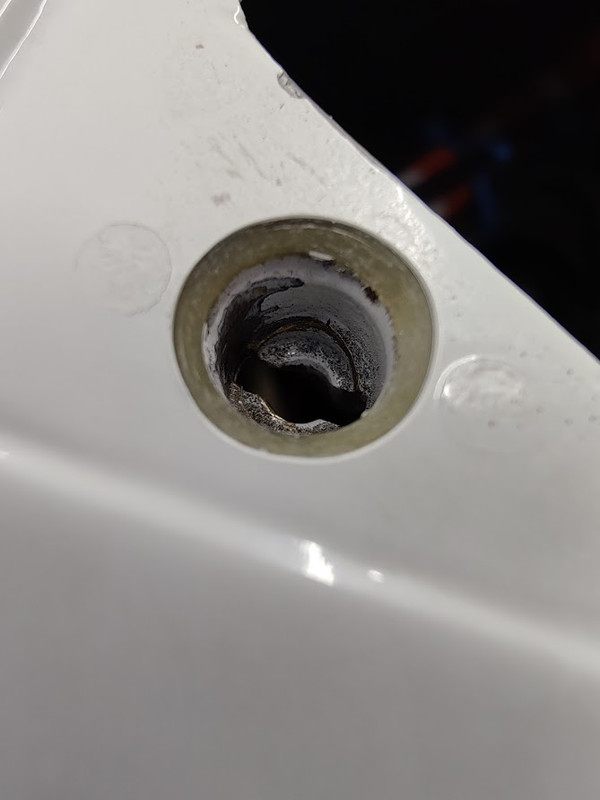
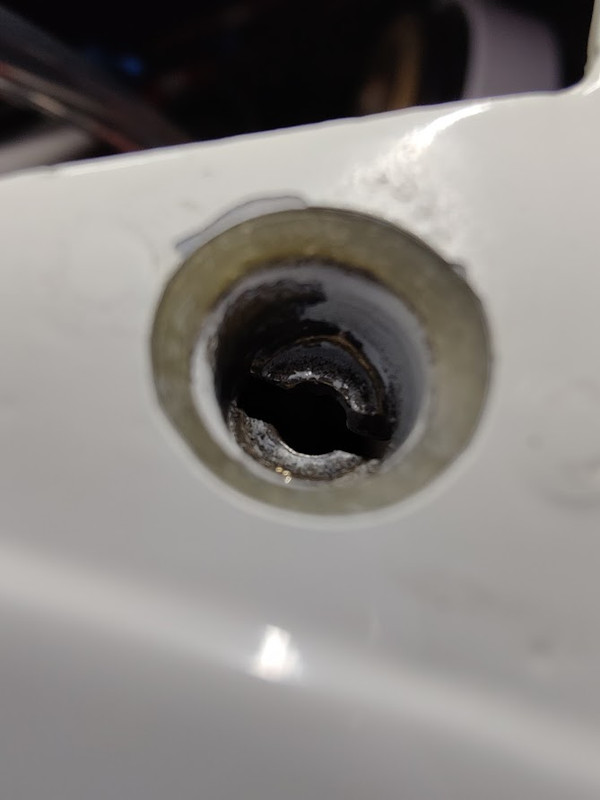
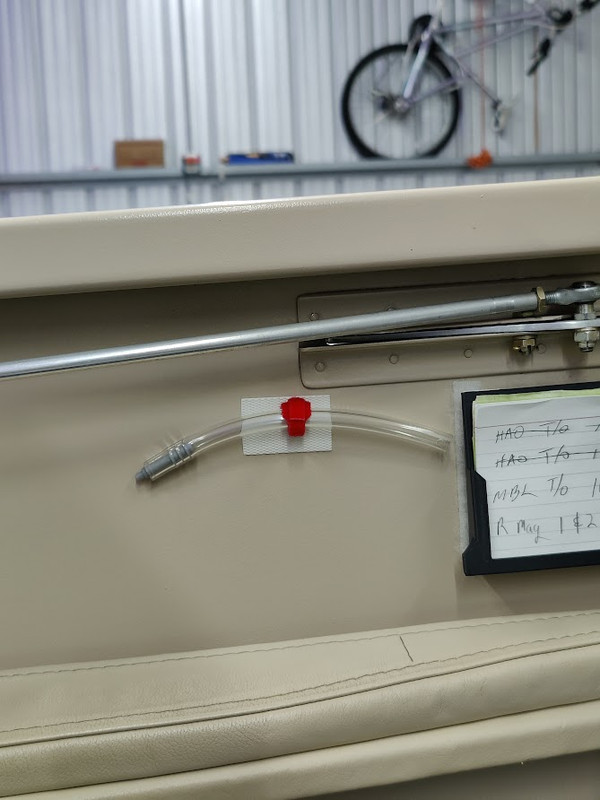
oil fill door hold-open idea... continuing to explore this. the pull test after two days exceeded my expectations. I was actually expecting a reduction in tension capability, but it increased. the only way I can explain this is that the tube slowly creeps into the wall texture of the socket. I my case there is some paint primer in there. anyway, it appears to become stronger with time for my socket texture.
aft socket
just installed pull test = 7 lb
after two days pull test = 12 lb
fwd socket
just installed pull test = did not test
after two days pull test = 9 lb
so, where to store this tube? I could attach it inside the oil door somewhere, but heat may affect it over time, but that would be the best location. for now, I'll attach it in the cockpit. wrap tightly with velcro strap squeezed the tube enough to secure.
this uses the standard oil fill door 3W camlock butterfly lock, but smoothed and polished
. this is just a small widget but may be of benefit to some, so I'll offer it on the website. another widget!
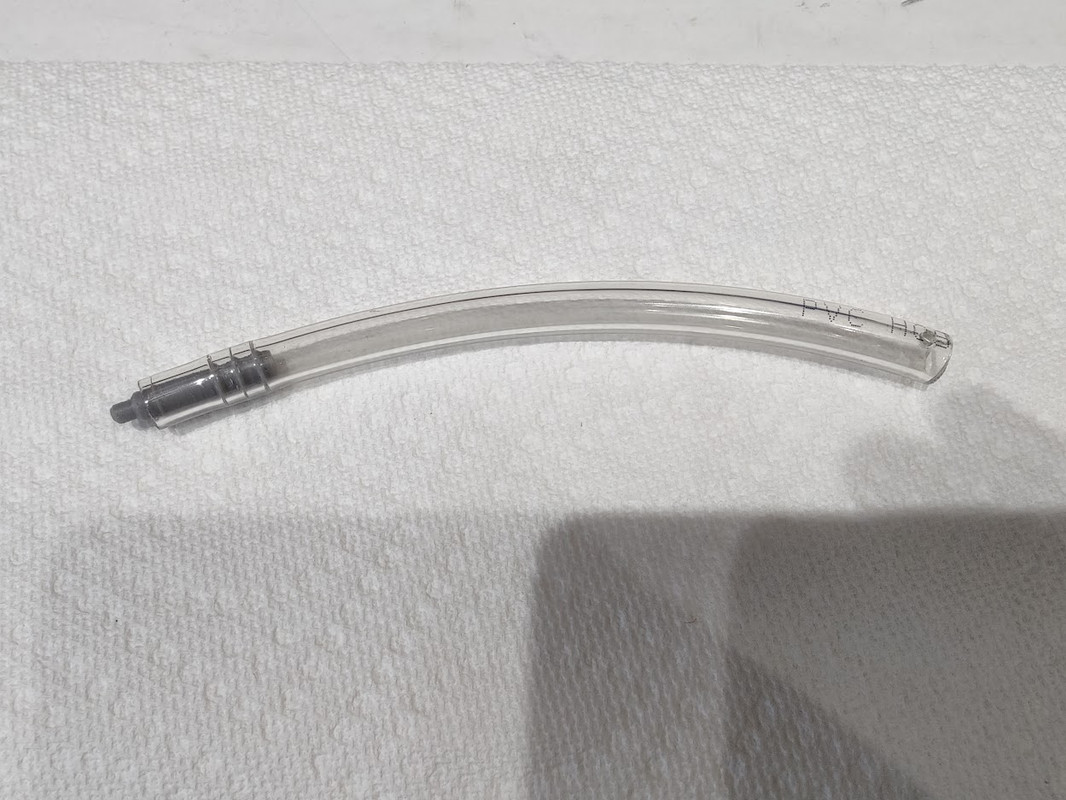
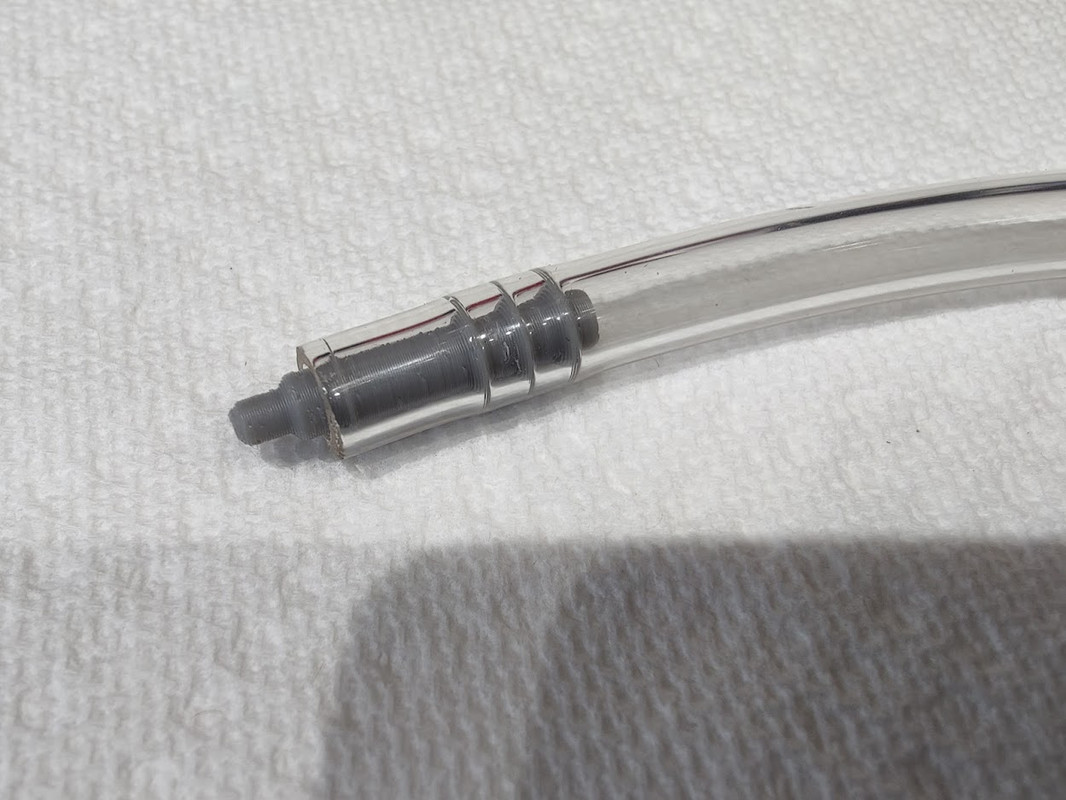
also, I made a stubby 3" tube, not sure what I will use this for but it's in the plane. maybe for rain or something?
I noticed how red brown my hand and arm are, reminded of my Choctaw Indian heritage by way of Oklahoma.


********
stubby tube, partial opening

Re: a couple printed widgets
Posted: Wed Oct 19, 2022 8:30 pm
by A2022