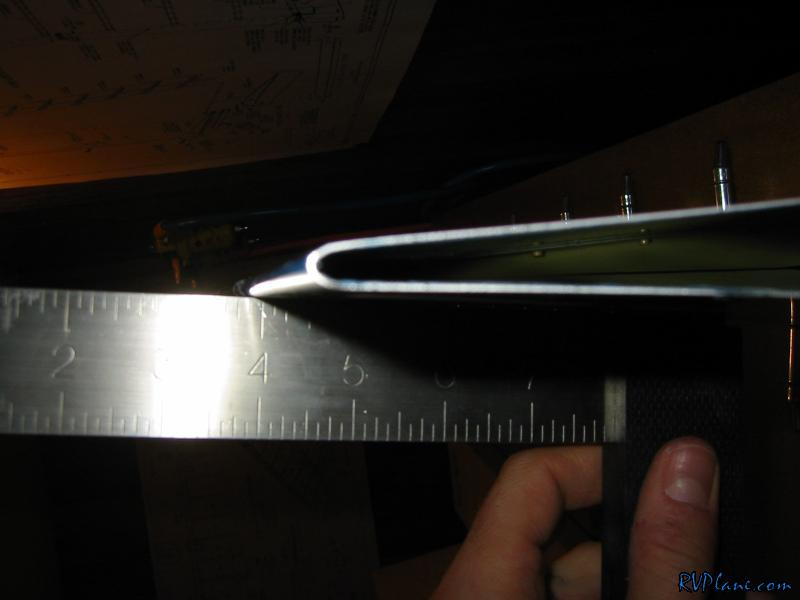
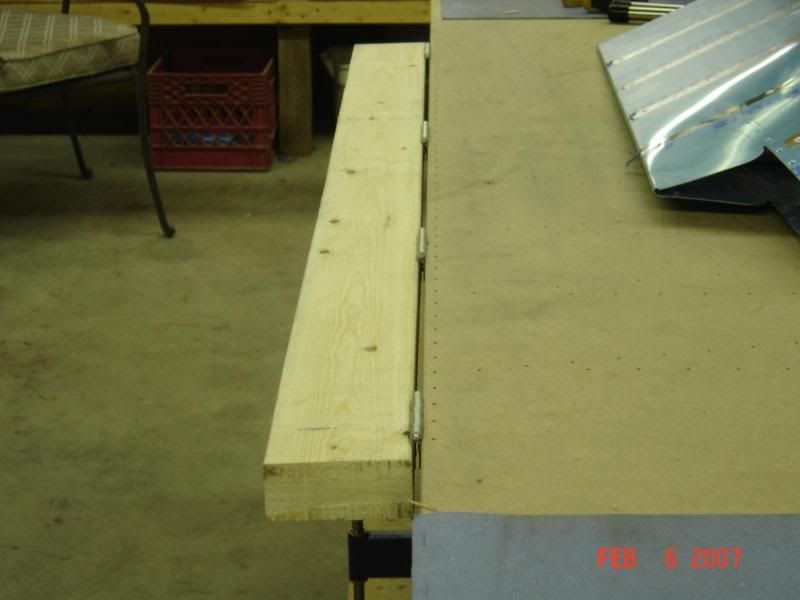
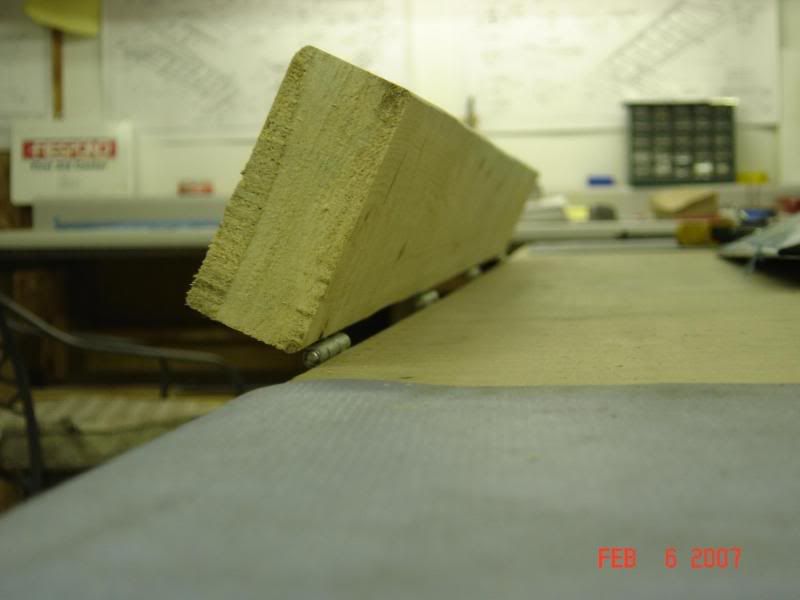
As far as how to use it, there are several techniques out there. My technique was to butt the trailing edge right up against the hinges. Then push down on the brake lightly. Bend it enough initially so the front rests on the spar you will put in. Now you need to check your trailing edge with a ruler. What you are looking for here is the ruler to rest straight on the trailing edge until it taper off where the skins pre-bent radius is, like this:
If the skin tapers off before the trailing edge, bend it more!
Mike Bullock http://www.rvplane.com RV-7 | Superior IO-360 | Whirlwind 200RV Garmin GTN650 | GRT Dual Sport SX EFIS
Status: FLYING!
Cherokee Driver wrote:
Once again, I am over thinking things.
That is sooooo easy to do. One of the things that helped me was reading/hearing one of the Van's employees remind a builder that at the end of the day we are building a 'tractor' and not a work of art. That has really helped me at times find center with respect to being 'good enough.'
Spike
http://www.rivetbangers.com - Now integrating web and mail!
Current Build: 2 years into a beautiful little girl
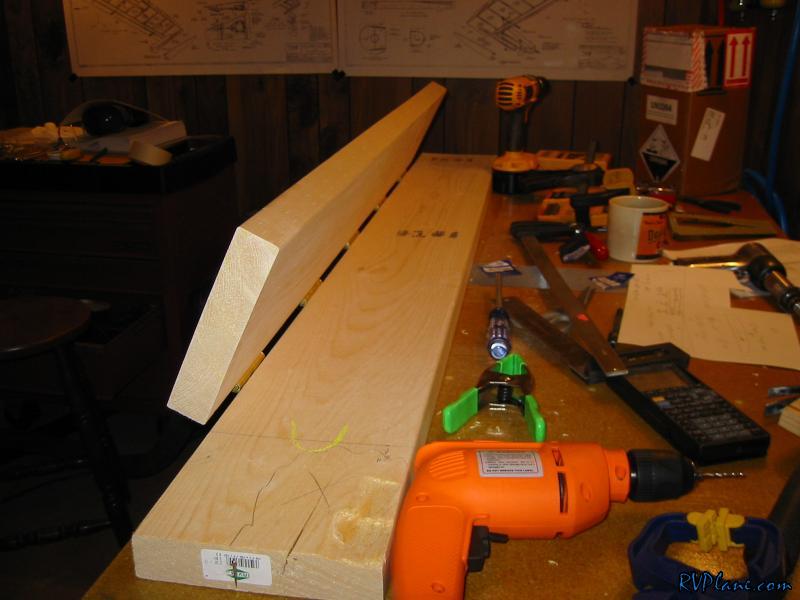
I got my brake from the guy who I bought most of my tools from used. He made two handles for each 2"X4". You can even just use 1"X2" material but mine are shaped to make it easier on your hand. I don't have a picture to post.
It is only fair that when I ask to see yours...I should be willing to show you mine.
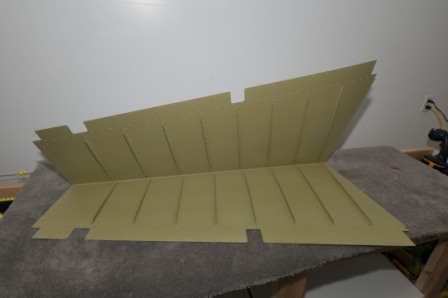
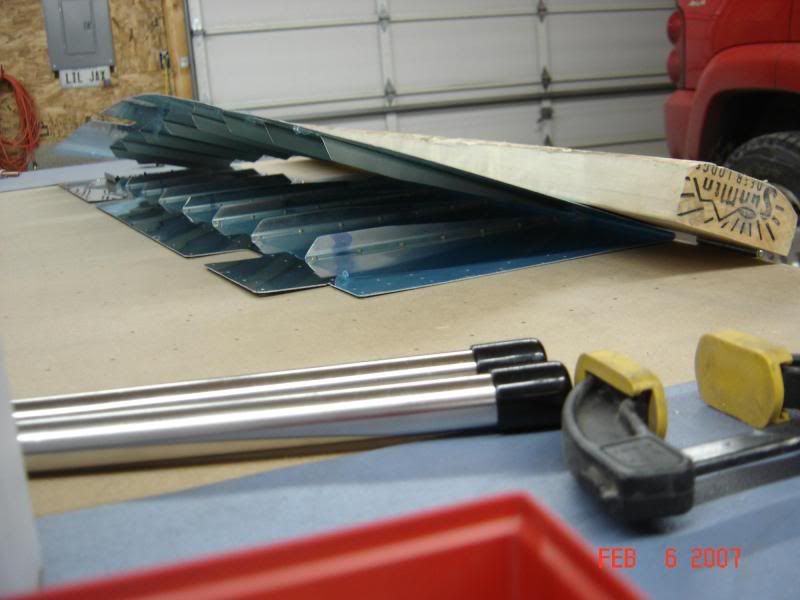
This is what I ended up with and it seemed to work OK.
Thanks again for the help guys.
By the way Vert. Stabilizer finished yesterday... and my new website is up and running. Feel free to check in.
I am not far along and the web stuff is new to me but the Expercraft site makes it quick and easy. I recommend it for those computer challenged builders.
Push the www button below to see it.
Take care.
CD
RV-8A
Wing Kit (Slow Build...very slow build)
Home of "Skunk Works, Wisconsin Branch"
"Glacial Pace...but lovin every minute of it!"
Looks good CD. If I could make one very small comment, and I am being somewhat picky here (but that's me). When you rivet the skins on, I find it gives a slightly (and I mean slightly) better result if you remove enough blue plastic so that the rivet set is only hitting the skin and not the plastic as well. It is true a flush set has a bevel, so don't read too much into my comment as I test my theories by looking at light reflections to see if it makes a difference. The more important issue with leaving plastic under where the rivet set is going to hit, is if there are any metal filings, they can get pounded into the skin.