Firewall tip (learned the hard way)

A forum for the proverbial airport bum who just wants to talk about anything and everything related to flying. Introduce yourself here !!

Post Reply
User avatar
captain_john
Sparky
Posts: 5880
Joined: Sun Oct 31, 2004 9:17 am
Location: KPYM

Firewall tip (learned the hard way)

Post by captain_john »

It is easy to cut things a bit short. Especially when not taking the kerf of the cutting blade into consideration when placing the cutting edge onto the line on the material.

The angles which attach the firewall to the floor are supposed to be 3" tall. Mine came out a bit too short!

See the little buggers on the table in the pic? They go right there on he bottom of the firewall. That's what I am talking about...

Image

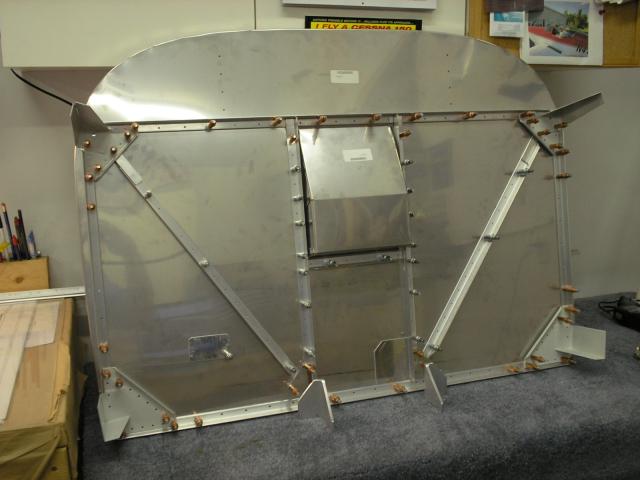
After polishing them and making them all pretty, I tried match drilling them to the firewall and the top holes lacked edge distance!

:x

Fortunately, these are made from the same stock as the front tank support brackets! I had enough left over from that job and from this one to make 2 replacement ones!

I made the new ones on the larger side (about 3 1/4" tall) and they should be fine. It is a whisker heavier, but hey...

Don't forget to radius the OUTSIDE of the vertex so they nest nicely into the the smaller angles stiffening the stainless sheet!

This should be just the trick!

Remember, measure twice!

Hope this helps someone else another time!

:) CJ
RV-7
Garmin G3X with VP-X & a TMX-IO-360 with G3i
It's all over but the flying! 800+ hours in only 3 years!

User avatar
aparchment
Class C
Posts: 522
Joined: Tue Nov 15, 2005 9:43 pm

weight issues

Post by aparchment »

Hmmm, yeah CJ I see what you mean. You wouldn't want to add any more weight to your plane than you can help. Heck, that big IO-390 you are considering is light as a feather, and all that pretty glass you are looking at weighs next to nothing! Glad to see you are keeping you plane light. :evil:

Antony

User avatar
JohnR
Class B
Posts: 1081
Joined: Mon Aug 29, 2005 3:22 pm
Location: Iowa

Post by JohnR »

Thanks for the warning CJ. I learned that lesson on the tank mounts. Glad that the raw material was big enough to allow for a practice piece and still make both mounts.

What are you thinking of the Fuse compared to the wings? Mine fuse ships this week so I need to wrap these wings up. Getting closer but still lots of finish type stuff to do.
JohnR
RV-7A - Fuselage - SOLD, just not supposed to be
Numbers 6:24 - The LORD bless thee, and keep thee

User avatar
captain_john
Sparky
Posts: 5880
Joined: Sun Oct 31, 2004 9:17 am
Location: KPYM

Post by captain_john »

That's right Antony!!!

:wink:

John, from my perspective, the fuse looks easier than the wings.

...in some ways!

Pro's

Only 1 part to make, by and large
Less priming
Very satisfying

Con's

When it is all drilled you rip it down to nothing to deburr and dimple!
Less clear instructions
More builder "engineering"

How do they say it?

Mux nix?

Still, all fun!

:P

Re the brackets:

After getting them to clear the required 3/32" on the bottim, they are only 1/8" longer than spec! Start LONG with these people. They mysteriously SHRINK!!!

:lol: CJ
RV-7
Garmin G3X with VP-X & a TMX-IO-360 with G3i
It's all over but the flying! 800+ hours in only 3 years!

User avatar
Wicked Stick
Class B
Posts: 1000
Joined: Wed Feb 09, 2005 10:00 pm
Location: KEWB

Post by Wicked Stick »

Yeah, I usually leave a 1/8 " extra on some parts and only grind it away if I need to. Very seldom have I had to do that.

With the 8, there are several angled parts that most builders make 2 or 3 times to get it the correct shape. One in particular I wish Van's would update the drawings on cause they are way off. (front tank attached angles)
Dave "WS" Rogers
RV-8 (125 hrs & counting)
N173DR

Post Reply