Your pro seal job looks excellent. It should leak test out OK
Jerry Fischer
RV7
Tail and both wings now complete.
Awaiting arrival of fuselage
Winder GA
Status Brantel #72823
-
Jerry Fischer
- Class G
- Posts: 3
- Joined: Mon Jun 04, 2007 12:33 pm
- Location: Winder GA
Nice work
Flying keeps me going
Finish Kit Here, Plug for Partain!
Thanks guys....
Partain's driver Bill delivered my finish kit today! He was great! Very nice person to deal with. Did exactly what he said he would do.
A good shout out for Partain and the service he gives to the RV community! The price is excellent compared to the large freight companies! The total delivery time is longer due to the fact that he must batch deliveries in a way that makes the most sense in order to make money but it is worth it!
ABF trashed my wing and fuse kits.. This time it was delivered in perfect condition and the driver said thank you!
Brantel (Brian Chesteen),
RV12-IS, #121606, N912BC - Building Now!
RV10, #41942, N????? - Project Sold
RV-7/TU, #72823, N159SB - SOLD
RV12-IS, #121606, N912BC - Building Now!
RV10, #41942, N????? - Project Sold
RV-7/TU, #72823, N159SB - SOLD
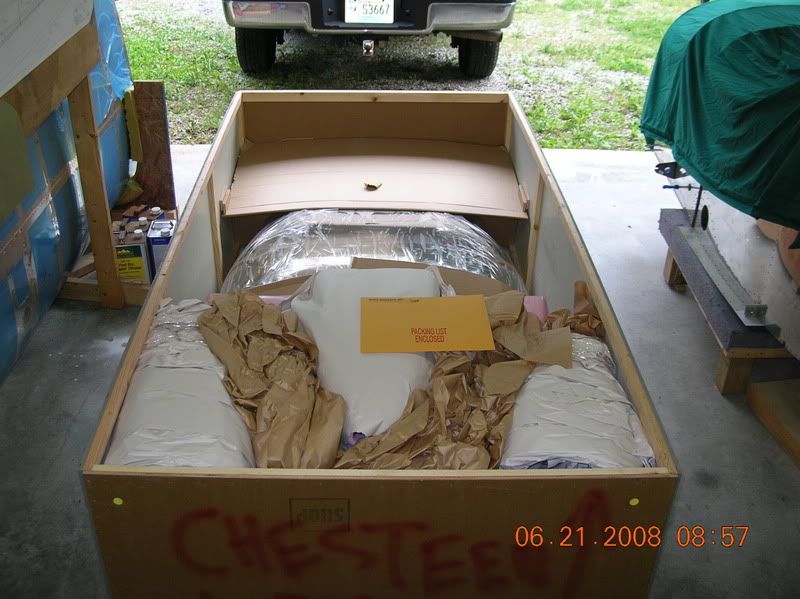
Finish Kit In Progress
Finish kit here! All is well with the inventory and most stuff is stored away. This took most of the day Saturday.
Way less in this kit but I guess much more expensive parts.
I don't know what they were thinking when they decided to do this:

Won't be many newer RV's flying around with unprimed or painted cowlings from now on....
Anyway, got started with the hinge point parts and got that all installed on both sides.
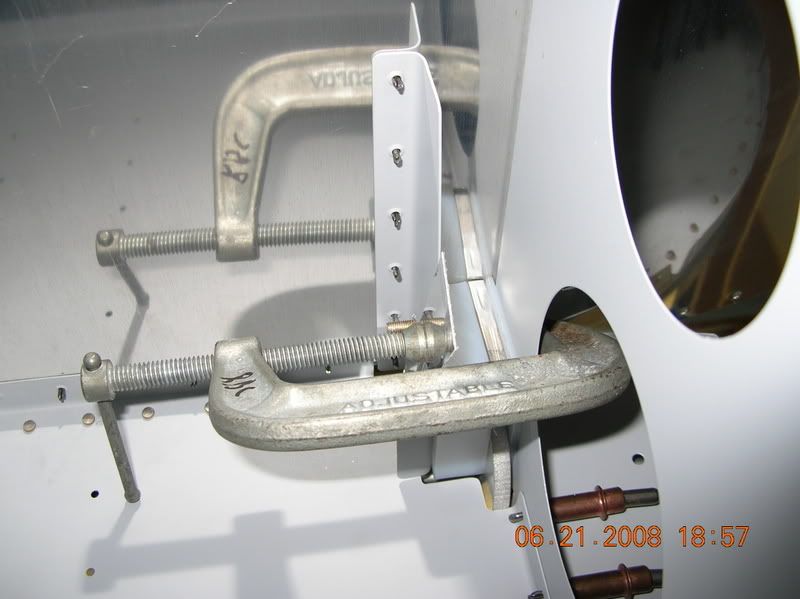
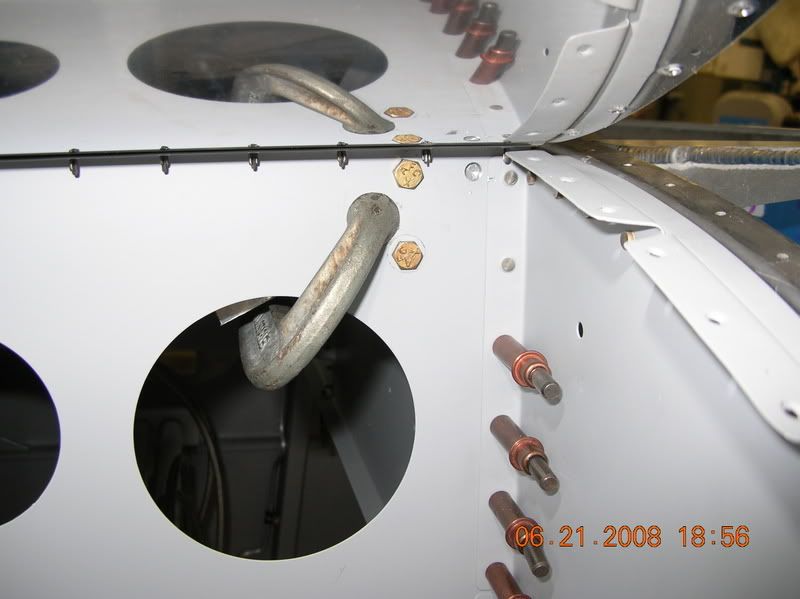
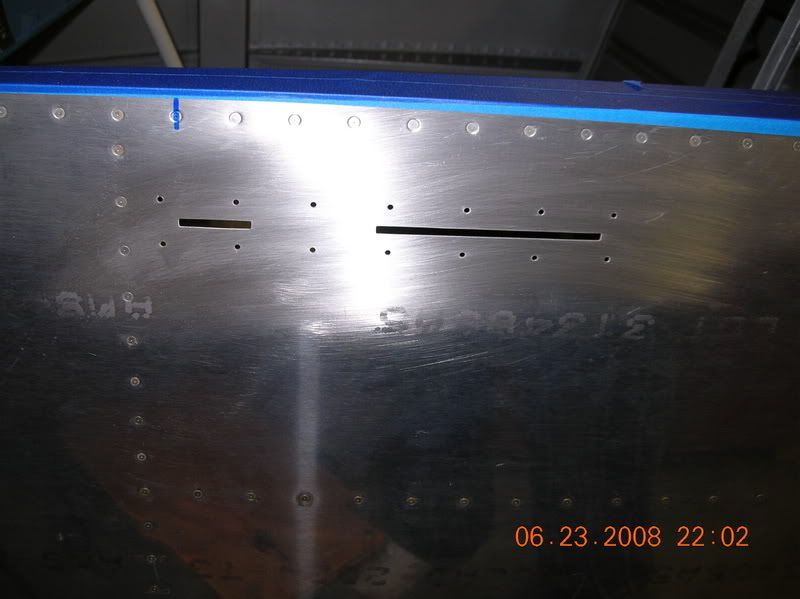
Tonight I will cut the latch mechanism slots in the sides of the fuse and get started on that stuff.
Way less in this kit but I guess much more expensive parts.
I don't know what they were thinking when they decided to do this:
Won't be many newer RV's flying around with unprimed or painted cowlings from now on....
Anyway, got started with the hinge point parts and got that all installed on both sides.
Tonight I will cut the latch mechanism slots in the sides of the fuse and get started on that stuff.
Brantel (Brian Chesteen),
RV12-IS, #121606, N912BC - Building Now!
RV10, #41942, N????? - Project Sold
RV-7/TU, #72823, N159SB - SOLD
RV12-IS, #121606, N912BC - Building Now!
RV10, #41942, N????? - Project Sold
RV-7/TU, #72823, N159SB - SOLD
-
Spike
- Chief Rivet Banger
- Posts: 4013
- Joined: Thu Oct 14, 2004 8:40 pm
- Location: Baltimore, MD
- Contact:
Very slick... though I have to say that the pink isn't soooo bad.
http://www.rivetbangers.com - Now integrating web and mail!
Current Build: 2 years into a beautiful little girl
Current Build: 2 years into a beautiful little girl
-
Bob Barrett
- Class C
- Posts: 625
- Joined: Sat Nov 13, 2004 8:37 pm
- Location: Sartell MN
Better Finish Kits!
The quality of the fiberglass on your cowl sure looks a lot better than the one I received. The paint guy spent 52 hours getting the fiberglass cowl to be sealed. Yours looks like you could shoot it with primer and follow with color.
-
TomNativeNewYorker

- Class D
- Posts: 439
- Joined: Tue Mar 21, 2006 9:19 pm
- Location: KSAV
Re: Better Finish Kits!
There are still plenty of pin holes. The top half looks like it either has a ton of chalky looking mold release on it or it has been sanded. Looks like the air inlet does on the bottom half. The bottom half is shiny in most areas. There is a nice scratch or groove on the front edge of the air inlet that will have to be worked on.Bob Barrett wrote:The quality of the fiberglass on your cowl sure looks a lot better than the one I received. The paint guy spent 52 hours getting the fiberglass cowl to be sealed. Yours looks like you could shoot it with primer and follow with color.
Brantel (Brian Chesteen),
RV12-IS, #121606, N912BC - Building Now!
RV10, #41942, N????? - Project Sold
RV-7/TU, #72823, N159SB - SOLD
RV12-IS, #121606, N912BC - Building Now!
RV10, #41942, N????? - Project Sold
RV-7/TU, #72823, N159SB - SOLD
Not sure what the honeycomb is made of but yep there is definately a core in there between the layers. This is not something new however.TomNativeNewYorker wrote:phenolic honeycomb core in the fiberglass cowling?
Brantel (Brian Chesteen),
RV12-IS, #121606, N912BC - Building Now!
RV10, #41942, N????? - Project Sold
RV-7/TU, #72823, N159SB - SOLD
RV12-IS, #121606, N912BC - Building Now!
RV10, #41942, N????? - Project Sold
RV-7/TU, #72823, N159SB - SOLD
-
TomNativeNewYorker
- Class D
- Posts: 439
- Joined: Tue Mar 21, 2006 9:19 pm
- Location: KSAV
yeah, brown core is phenolic core, i have worked with it before on nose radomes and ventral fins on F-14 Tomcats.Brantel wrote:Not sure what the honeycomb is made of but yep there is definately a core in there between the layers. This is not something new however.TomNativeNewYorker wrote:phenolic honeycomb core in the fiberglass cowling?
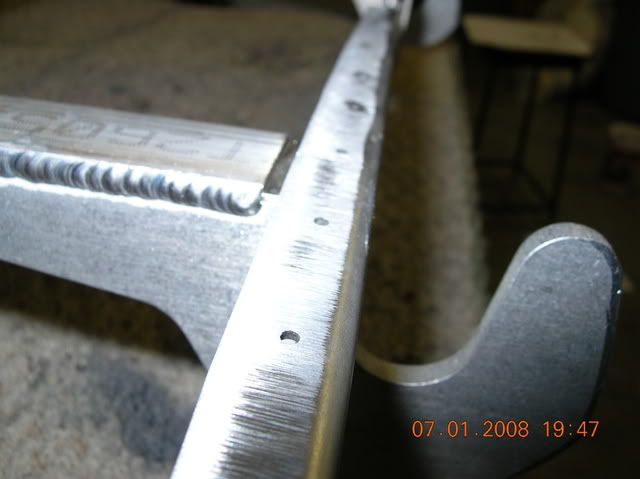
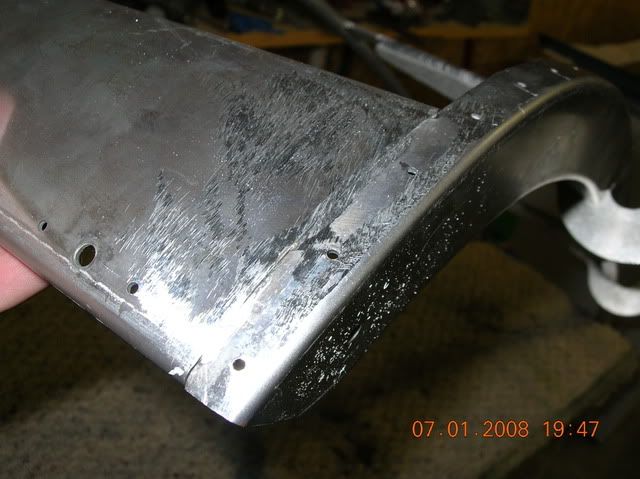
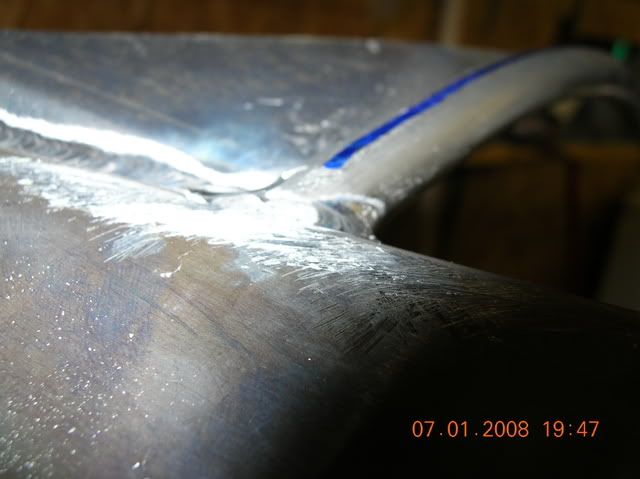
Canopy progress
Last night I layed out and finished this little piece of the puzzle. This is a scary process because everyone will see this workmanship....
Brantel (Brian Chesteen),
RV12-IS, #121606, N912BC - Building Now!
RV10, #41942, N????? - Project Sold
RV-7/TU, #72823, N159SB - SOLD
RV12-IS, #121606, N912BC - Building Now!
RV10, #41942, N????? - Project Sold
RV-7/TU, #72823, N159SB - SOLD
Thanks Weez,weezbad wrote:if your gonna put uhmw tape on the angles that fit behind there make sure you do it before you drill the angles to the skin. else you will end up with mis aligned holes...ask me how i know.
I read other stories about that one before I drilled. Seems some people love the tape others hate it. I ended up putting it on but also placed a few layers of 3m green autobody masking tape on top of it on both anges before assembling and drilling. The directions are screwed up on this and there is some miswording I think. I believe it was the original intent of the designer writing those directions to mean to both install the UHMW tape and to also put something in there to provide a little clearance so that is what I did.
Seemed to work out great. There is plenty of clearance and the sloppiness can be tuned out by the tightness of the pivot bolt.
Anyone know why the little offset that sticks thru the long slot in the skin is cut back so far? Seems it would be better if it came all the way to the front of the slot.
I love how well the slot came out to match the thickness of the pivot arms.
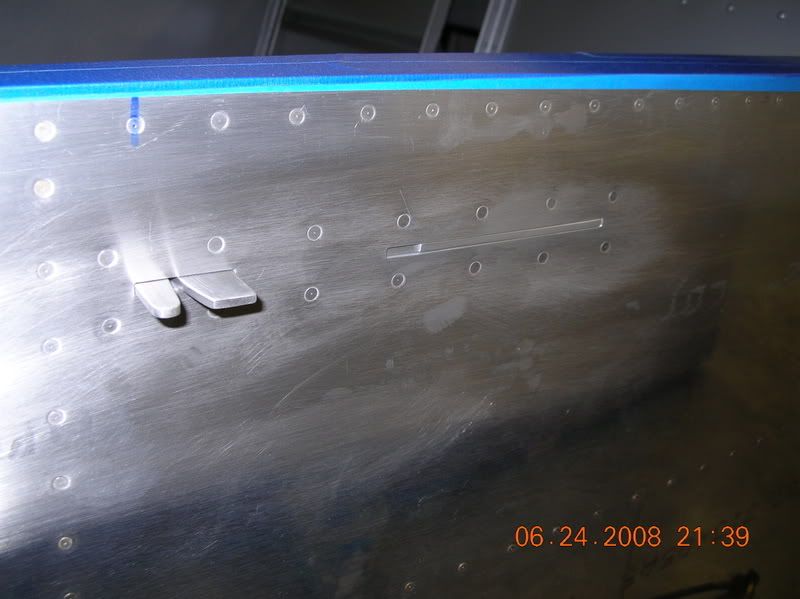
After this pic, I installed the spring. With a little filing, it works perfectly. I think it was on Chad's site where I read that it closes and latches with a "satisfying click". Mine does as well.
Brantel (Brian Chesteen),
RV12-IS, #121606, N912BC - Building Now!
RV10, #41942, N????? - Project Sold
RV-7/TU, #72823, N159SB - SOLD
RV12-IS, #121606, N912BC - Building Now!
RV10, #41942, N????? - Project Sold
RV-7/TU, #72823, N159SB - SOLD

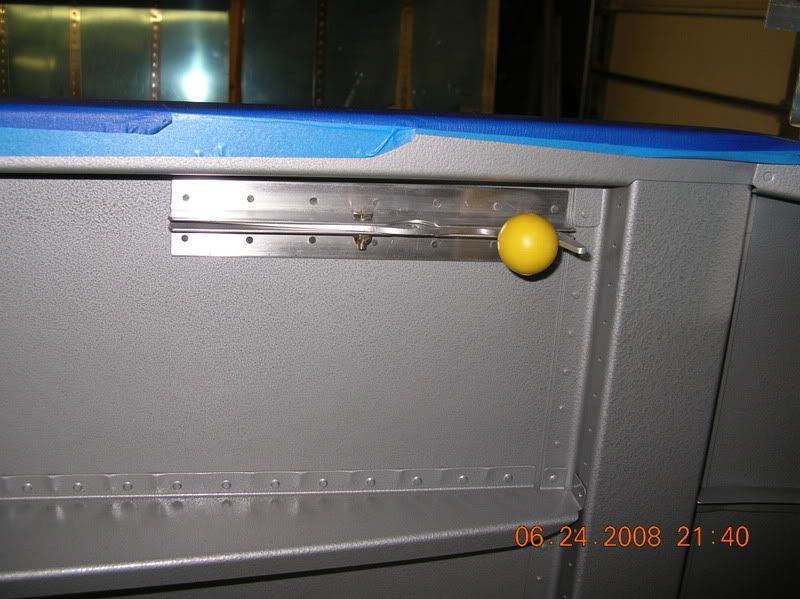
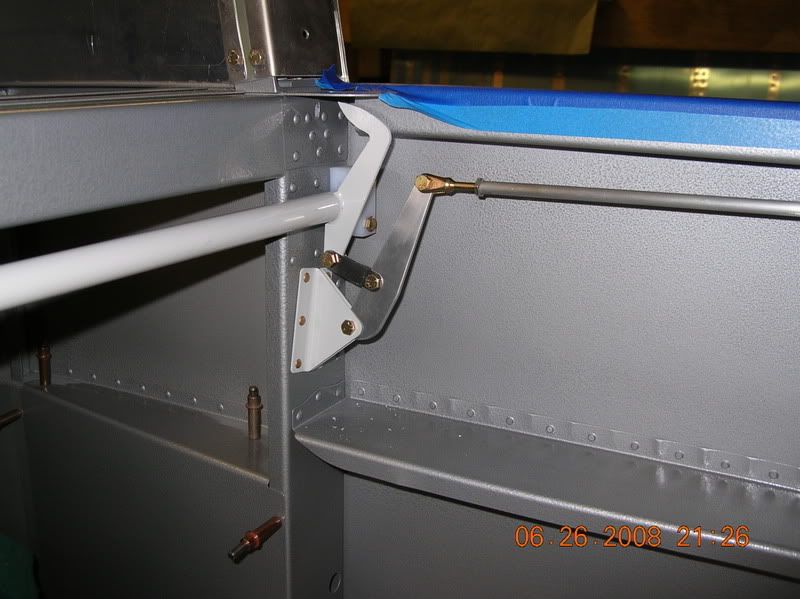
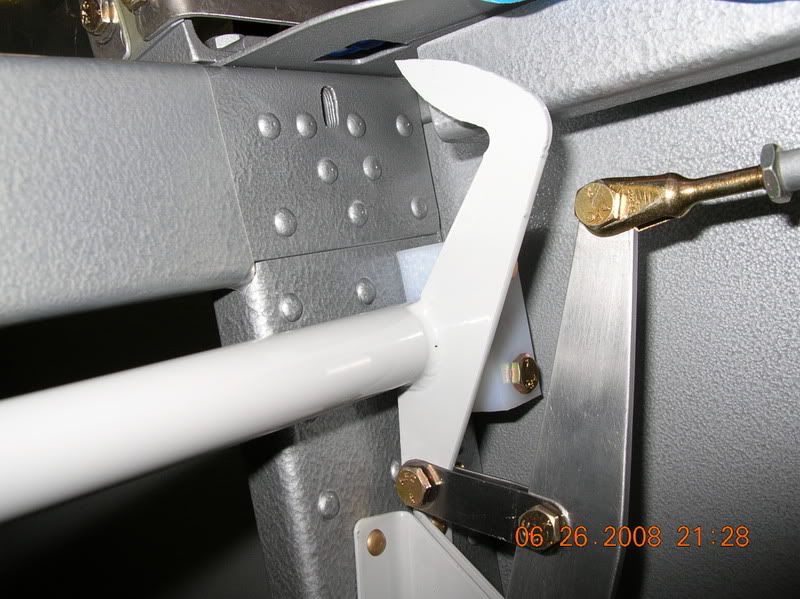
Got picture happy while working on finishing my canopy latch...
Who knows maybe this will help someone visualize how it all works. Pretty cool, simple but functional system if you ask me.
Here is the front end complete with the spring. The spring naturally wants to fall off to the bottom of the arm so I just left it that way. Still works fine so who cares.

Here is the rear business end of the latch. You will need a 1/4-28 tap for this and most simple tap kits don't have that one. The little link plates must be bent on the ends and twisted slightly. This is easy to do, just lay them against the arms and see what they need to line up
The latch in the open position..
And in the closed position..

More detail on the lower part of the mechanism..
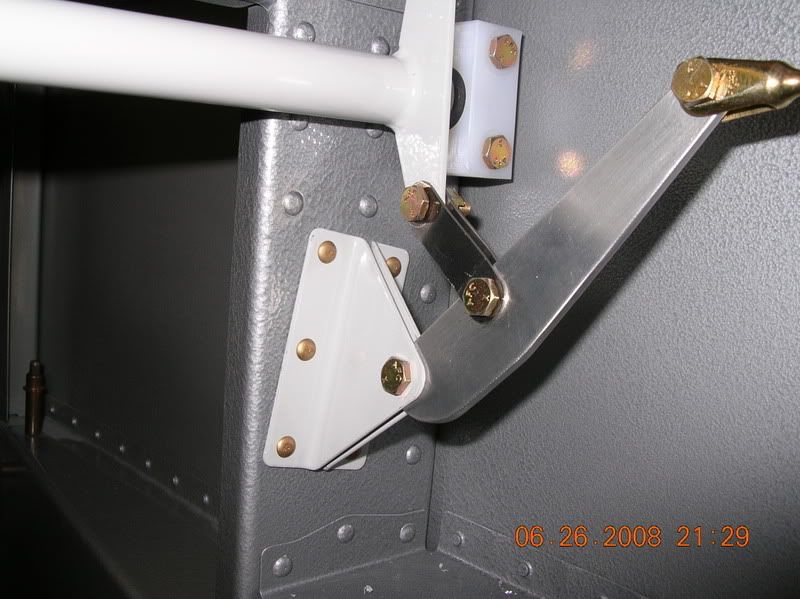
Sure wish whoever makes the steel weldments for Van's would debur them before powder coating them! The edges of the pointed parts of the latch weldment are very rough under the powder coat.
The last thing I did was take a file and file chamfers on the part of the latch handle that rotates, goes thru the two angles and sticks thru the side of the fuse. There is enough slop in this that when you rotate it, it can catch on the edges of the angle as it passes thru. If you tighten the bolt too much, it makes the rotation draggy. The chamfer helps a ton to lead the arm into the slot.
Who knows maybe this will help someone visualize how it all works. Pretty cool, simple but functional system if you ask me.
Here is the front end complete with the spring. The spring naturally wants to fall off to the bottom of the arm so I just left it that way. Still works fine so who cares.
Here is the rear business end of the latch. You will need a 1/4-28 tap for this and most simple tap kits don't have that one. The little link plates must be bent on the ends and twisted slightly. This is easy to do, just lay them against the arms and see what they need to line up
The latch in the open position..
And in the closed position..
More detail on the lower part of the mechanism..
Sure wish whoever makes the steel weldments for Van's would debur them before powder coating them! The edges of the pointed parts of the latch weldment are very rough under the powder coat.
The last thing I did was take a file and file chamfers on the part of the latch handle that rotates, goes thru the two angles and sticks thru the side of the fuse. There is enough slop in this that when you rotate it, it can catch on the edges of the angle as it passes thru. If you tighten the bolt too much, it makes the rotation draggy. The chamfer helps a ton to lead the arm into the slot.
Brantel (Brian Chesteen),
RV12-IS, #121606, N912BC - Building Now!
RV10, #41942, N????? - Project Sold
RV-7/TU, #72823, N159SB - SOLD
RV12-IS, #121606, N912BC - Building Now!
RV10, #41942, N????? - Project Sold
RV-7/TU, #72823, N159SB - SOLD
it does look great. the sensation i got when i saw the macro pics was, damn thats clean.cjensen wrote:Brian, the more I look at the paint job you did, the more I want to respray mine...

The latch looks great!!
william....don't let it beat you down, you are stronger than you think.
Got started on the canopy frame.
First taking the advice off several websites, I did some prep work to help with some known issues:
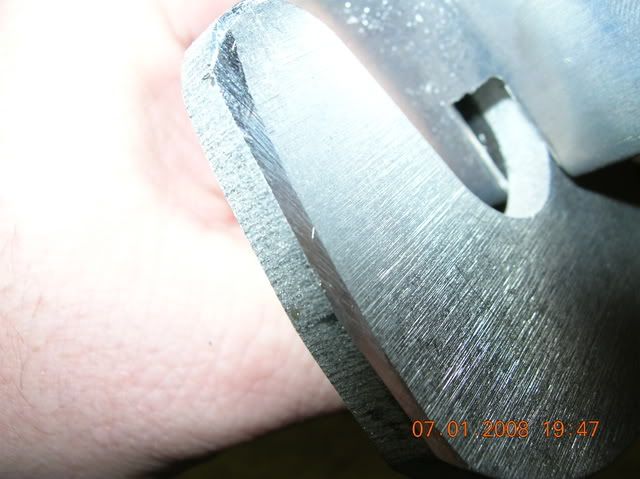
Chamfered the front edges of the hinge pivot spacers/bearings.
Chamfered the front edges of the hinges.
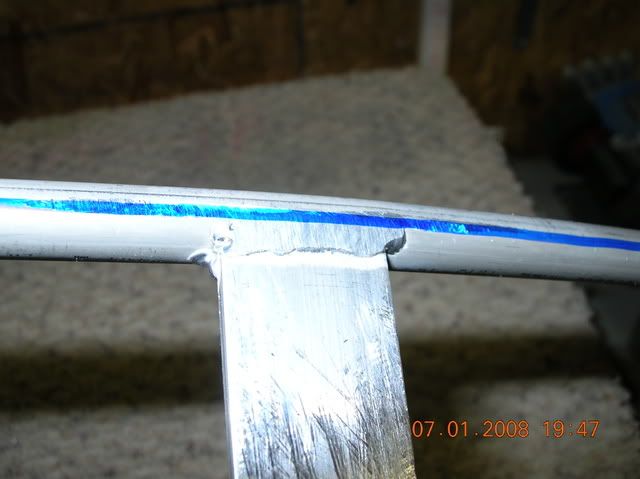
Filed down the welds on the frame weldment to the aft tube.
Squared up the frame ribs by sanding the aft edge.
Filed the bumps from the sides of the frame where they joing the front ribs. Filed another weld bump on both sides off.
Applied the UHMW tape to the front/bottom of the canopy skin. I purchased a 14' roll of this stuff from Van's and have used a ton of it for things like this and the seat back bulkhead.
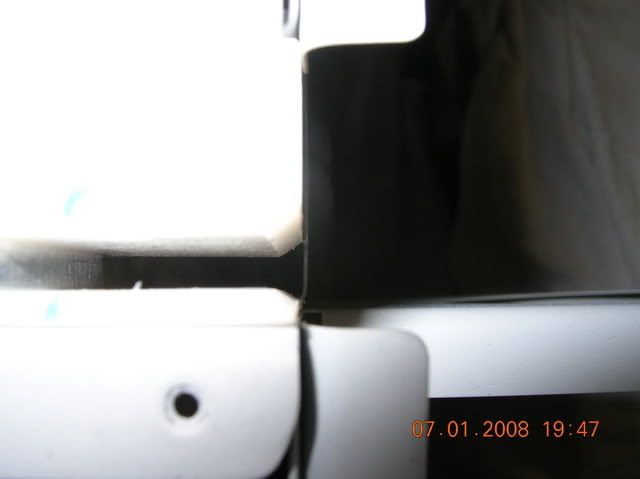
Drilled the skin to the frame on all the prepunched holes except these were everyone has this problem. The left side has way more of a gap than the right. The left has a really wide gap!
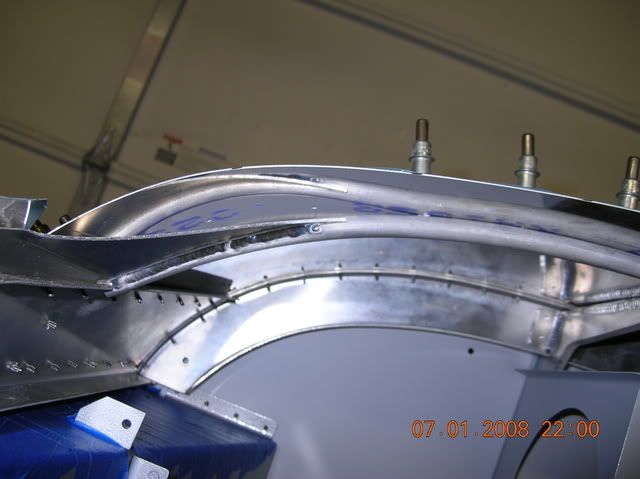
And installed it for the first time to check the initial fit. Fits like crap... I can get it all the way forward but the sides at the front overlap outboard of the fuse by at least an 1/8th on both sides. The aft part is inboard of the sides by at least an 1/8th on both sides.

First taking the advice off several websites, I did some prep work to help with some known issues:
Chamfered the front edges of the hinge pivot spacers/bearings.
Chamfered the front edges of the hinges.
Filed down the welds on the frame weldment to the aft tube.
Squared up the frame ribs by sanding the aft edge.
Filed the bumps from the sides of the frame where they joing the front ribs. Filed another weld bump on both sides off.
Applied the UHMW tape to the front/bottom of the canopy skin. I purchased a 14' roll of this stuff from Van's and have used a ton of it for things like this and the seat back bulkhead.
Drilled the skin to the frame on all the prepunched holes except these were everyone has this problem. The left side has way more of a gap than the right. The left has a really wide gap!
And installed it for the first time to check the initial fit. Fits like crap... I can get it all the way forward but the sides at the front overlap outboard of the fuse by at least an 1/8th on both sides. The aft part is inboard of the sides by at least an 1/8th on both sides.
Brantel (Brian Chesteen),
RV12-IS, #121606, N912BC - Building Now!
RV10, #41942, N????? - Project Sold
RV-7/TU, #72823, N159SB - SOLD
RV12-IS, #121606, N912BC - Building Now!
RV10, #41942, N????? - Project Sold
RV-7/TU, #72823, N159SB - SOLD
-
Bob Barrett
- Class C
- Posts: 625
- Joined: Sat Nov 13, 2004 8:37 pm
- Location: Sartell MN
No truth to the Rumor that only sliding Canopies are a pain
No truth to the Rumor that only sliding Canopies are a pain in the bottom! Having cussed and discussed my slider canopy frame and some RV builders told me you should have built a tip-up! I am convinced that Van's kits are the best on the market but their fiber glass components leave a lot to be desired! Have fun and keep plugging along.